HOWTO Convert Design Doc Images With GraphicsMagick
2022-02-02T05:03:00Z Updated.
This tutorial is a work in progress. Please read it, try it and ask help in PMC Tactical Forum FS19 editing area with specific details of what doesn't work.
This is part two of our GIMP Terrain Design Document Tutorial for FS19 page. HOWTO use GraphicsMagick to convert design doc exported images into Giants Editor (GE) readable density and _weight images.
GIMP Design Doc Exported File Names
These are the file names we use because graphicsmagick is reading these specific file names. If you have suggestion of more better, logical, file names feel free to suggest by contacting us.
File names exported from GIMP:
farm_yards.png
fields.png
forests.png
railroads.png
roads_asphalt.png
roads_dirt.png
Exporting Design Doc Layers to PNG Images
HOWTO export layers as images from GIMP terrain design doc. This XCF image is setup and painted in such way that all you need to do is to have a single layer visible and then you use CTRL-SHIFT-E "Export As...", type in file name and hit enter.
First hide visibility from all layers except railroad tracks layer. The order which you export doesn't really matter, you could go one by one in order of layer appearance or roads first etc, it does not matter.
Below screenshot shows all layers visibility off.
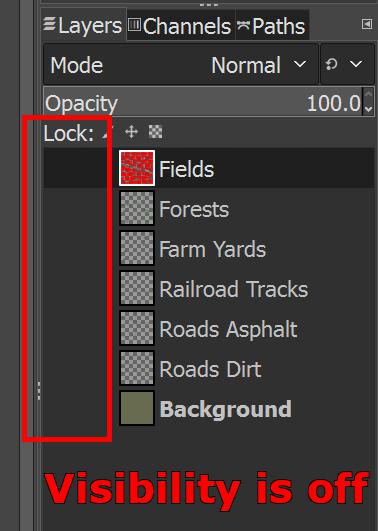
Now click the visibility area to enable visibility to railroads or railroad tracks as the layer is shown in our screenshot example.

Now use CTRL-SHIFT-E "Export As..." to export this currently shown image, give it file name "railroads.png". Use the options / values seen in below screenshot, in other words nothing selected heh.

Next hide current railroad tracks layer by turning off visibility, then in roads asphalt layer turn on visibility as shown in below screenshot.

Then CTRL-SHIFT-E export as roads_asphalt.png file name.
Now as you learned how to turn GIMP layer visibility on/off and export PNG images, follow through the remaining layers using the file names shown above. To recap: export roads dirt, farm yards, fields and forests.
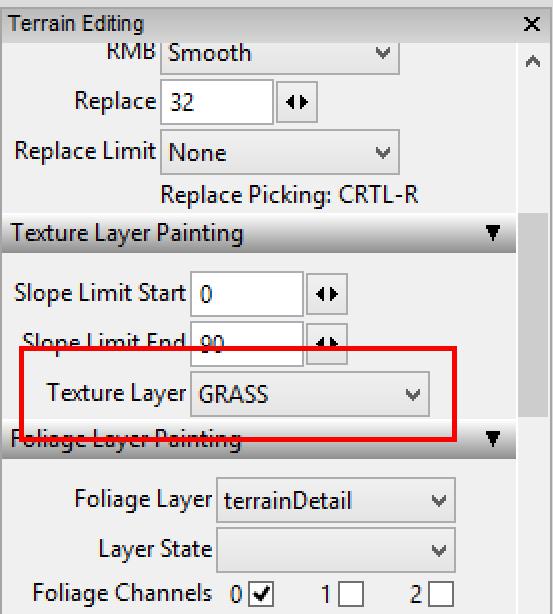
Default Grass Weight Images
You need to have default grass terrain detail texture weight images. You'll create these in GE by painting everything in GRASS. This is mapUS texture, if your terrain source files are from mapDE or something custom without GRASS I suggest you learn this tutorial info using a new mapUS sample terrain files first. Later you can use the new knowledge and do other terrain detail texture types.
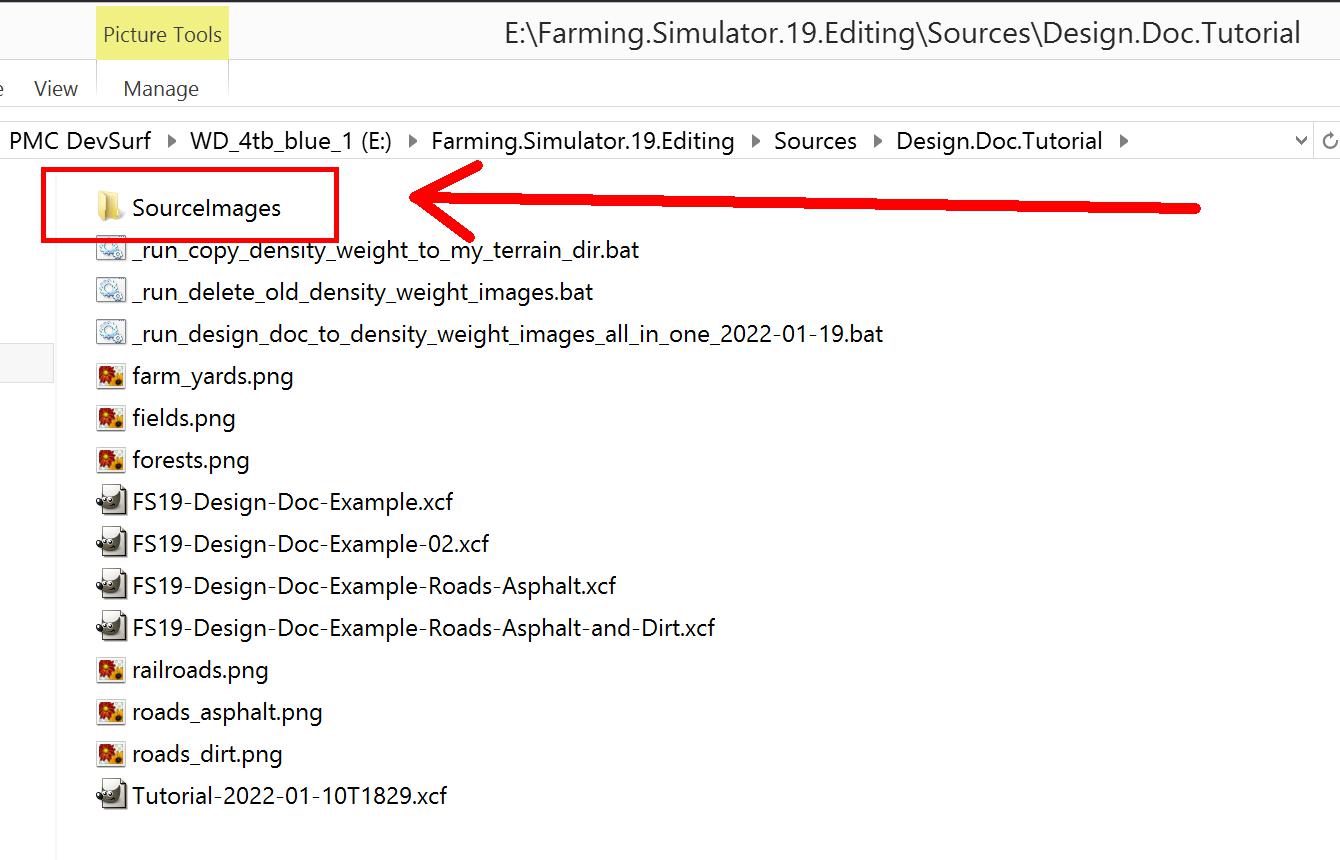
Once done, save GE project and exit. Then copy the grass0?_weight.png images into "SourceImages\" directory which is located in the dir where your design doc exported PNG images and the graphicsmagick bat file is located. See below screenshot:
Do not worry there is an error check and if the path/file does not exist this bat aborts.
GraphicsMagick Image Conversion
GraphicsMagick using our BATCH (bat) file will read the GIMP exported PNG images, processes them and saves out GE readable cultivator_density, fruit_density and weight images, no need to edit anything, just run the bat and copy files to GE terrain project dir.
Download GraphicsMagick PMC.Design.Doc.To.GE.Demo.1.2022-01-20T0306.7z Batch.Files.And.Scripts.2024-03-18 file. This 7-zip packet currently includes example PNG image files too.
If you already painted and exported your design doc PNG images, dont overwrite them with the .7z packets example files. You can test the bat file by unpacking the .7z to temporary dir and just running the bat, it should process all images OK as long as your graphicsmagick is working and your windows (win10 cough cough) wont start some stupid powershell :)
Unpack the 7-zip archive and run the bat file in the same directory as the design doc exported PNGs are. If you are missing any PNGs for any reason, the bat file will give you error and aborts.
Execute / run / start the bat file by LMB double clicking it, or selecting it and pressing enter (which ever way like).
When the bat file has ran you see this kind of dos cmd.exe window:
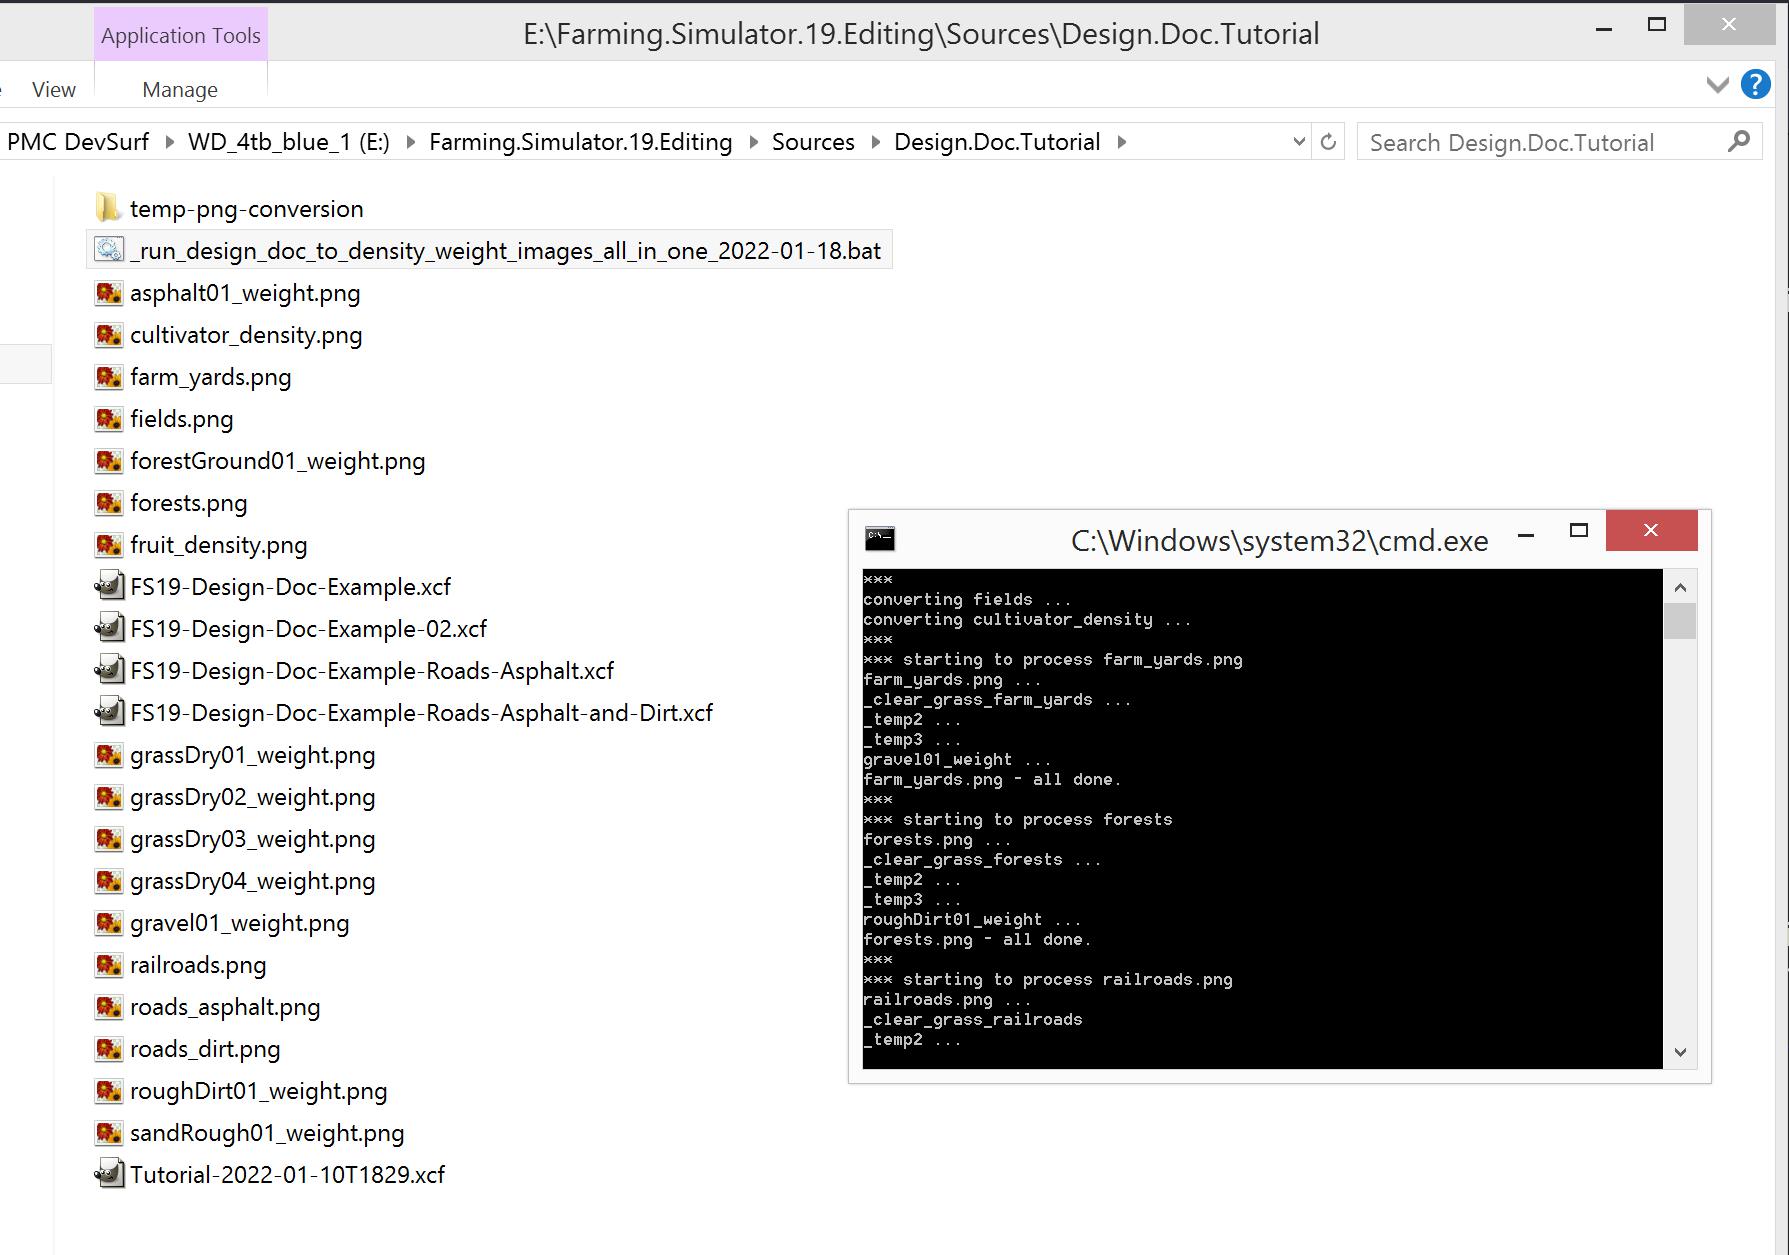
Please note that the above screenshot is how it looks in our windows 8.1 system at the time of writing this, most likely it looks different on your windows file explorer and its different on windows 8.1 versus windows 10. Command prompt CMD.EXE console is much larger in win10 for example. That screenshot is just an overall guide to help understand whats happening.
Without Railroads
But what if your terrain doesn't have railroads? What happens then? Its no problem, you can get through of not having railroads or farm yards or forests in your terrain by simply GIMP design doc exporting an empty layer, so the exported PNG image is simply transparent.
It is not at all odd to have terrain without railroads, I would even go as far as saying that railroads are a special feature. So it is not a problem to export empty layer and use it for any terrain detail texture types you want, being it forest or farm yard or even asphalt roads if you terrain is some backwoods forgotten place without asphalt roads.
Exporting an transparent layer from GIMP. If you want to export transparent image you cant hide all layers and export, the image will get the bottom/last layer printed to it. You have to have transparent layer visible. You can simply create a new layer, do not paint anything to it, just have it visible and CTRL-SHIFT-E export.
Final Density and Weight Images
Once graphicsmagick is done, you should have new PNG images in the directory, these are: asphalt01_weight, cultivator_density, forestGround01_weight, fruit_density, grass01_weight (01-04), gravel01_weight, roughDirt01_weight and sandRough01_weight.
These new images can be copied directly to your GE terrain project directory. If you had prior terrain detail texture painting done in GE for other terrain types than what we did here, then you must black out the whole *_weight.png image list in your terrain project dir.
Note about below screenshot: its not the design doc I drew previously... just go with it heh.
If there are any overlapping white pixels (or missing black ones, I know, its tricky) in the whole *_weight.png image list, then some of your ground textures get painted as MUD_DARK. If this happens, then just black out all weight images and copy the new design doc generated images over again.
PMC graphicsmagick bat files do not make mistakes, that is the whole point here, remove human error and do image processing automatically. If your terrain detail textures in GE turn into MUD_DARK, then either the source design doc images or your existing GE terrain project dir weight images are at fault.