GIMP Paint Precision Farming Soil Types
2021-07-05 updated.
See also Soil Types for Precision Farming FS19 tutorial how to add it to your terrain.
HOWTO GIMP paint soil types easily according to elevation for Farming Simulator 19 Precision Farming.
- open grayscale heightmap image
- rescale down to 1024 resolution using image -> scale image, use interpolation cubic
- use image -> mode -> RGB
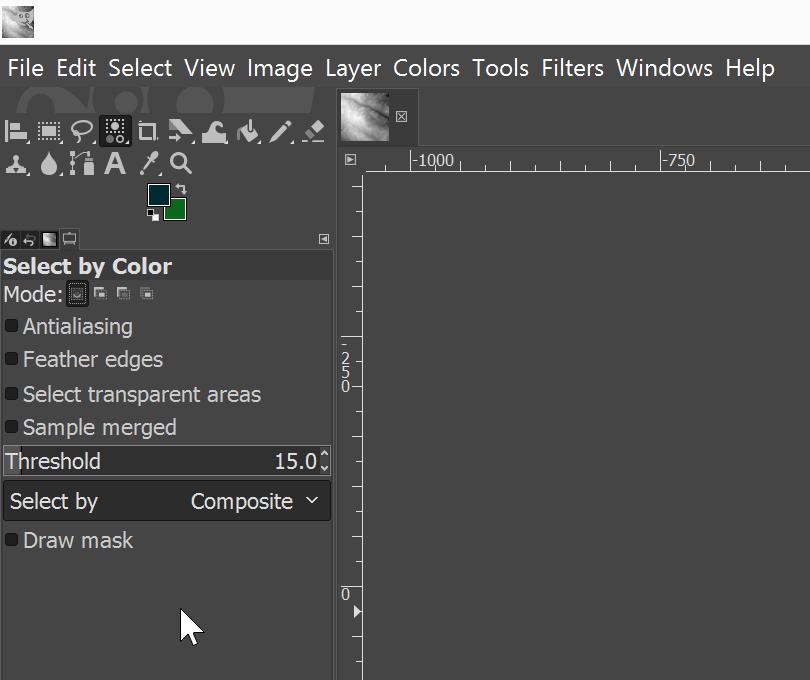
- press SHIFT-O for select by color and keep threshold 15
- make sure antialiasing is DISABLED
- now just click on heightmap elevations and get nice areas selected for painting
- grow selection size by adding to it with SHIFT-LMB clicks
- use color palette change foreground color to pick RGB
- use CTRL-, to fill with foreground color
In select by color options dialog, use mode replace or add depending of your needs.
Then just repeat the process until everything is painted with the four color types you want.
At this point save your nicely colored image to XCF so its kept safe.
Once done, GIMP export SHIFT-CTRL-E image to 1024 x 1024 resolution PNG under the "GIMP_PF_soilmap.png" filename. Then run graphicsmagick bat file as shown below.
Obviously if your heightmap is completely flat this doesn't work as it only would produce one color. Your heightmap should not be flat one RGB color unless you're creating some odd test scenario terrain.
Recommened GIMP Human Readable Colors
There are four soil types; loamy sand, sandy loam, loam and silty clay. Here are example colors that are easy to see compared to the GRLE basically all black to human eye colors used by the final GRLE image.
I have chosen these RGB colors for my soil type design GIMP images:
Loamy Sand 254,209,80
Sandy Loam 123,155,118
Loam 138,126,114
Silty Clay 0,42,49
In-game GRLE image uses again RGB numbers of 0,0,0 and 1,1,1 and 2,2,2 and 3,3,3 so we will use graphicsmagick to automatically convert human readable RGBs into these GRLE values, see below.
Step by Step Tutorial
No comprende eh amigo? Okay, I'll draw you a pretty picture ![]()
Click on the below images to make them full size high resolution.
First I use GIMP to open heightmap_L3DT.png original grayscale GE readable heightmap image. Filename in this case wont matter, yours can be called mapDE_dem.png etc.
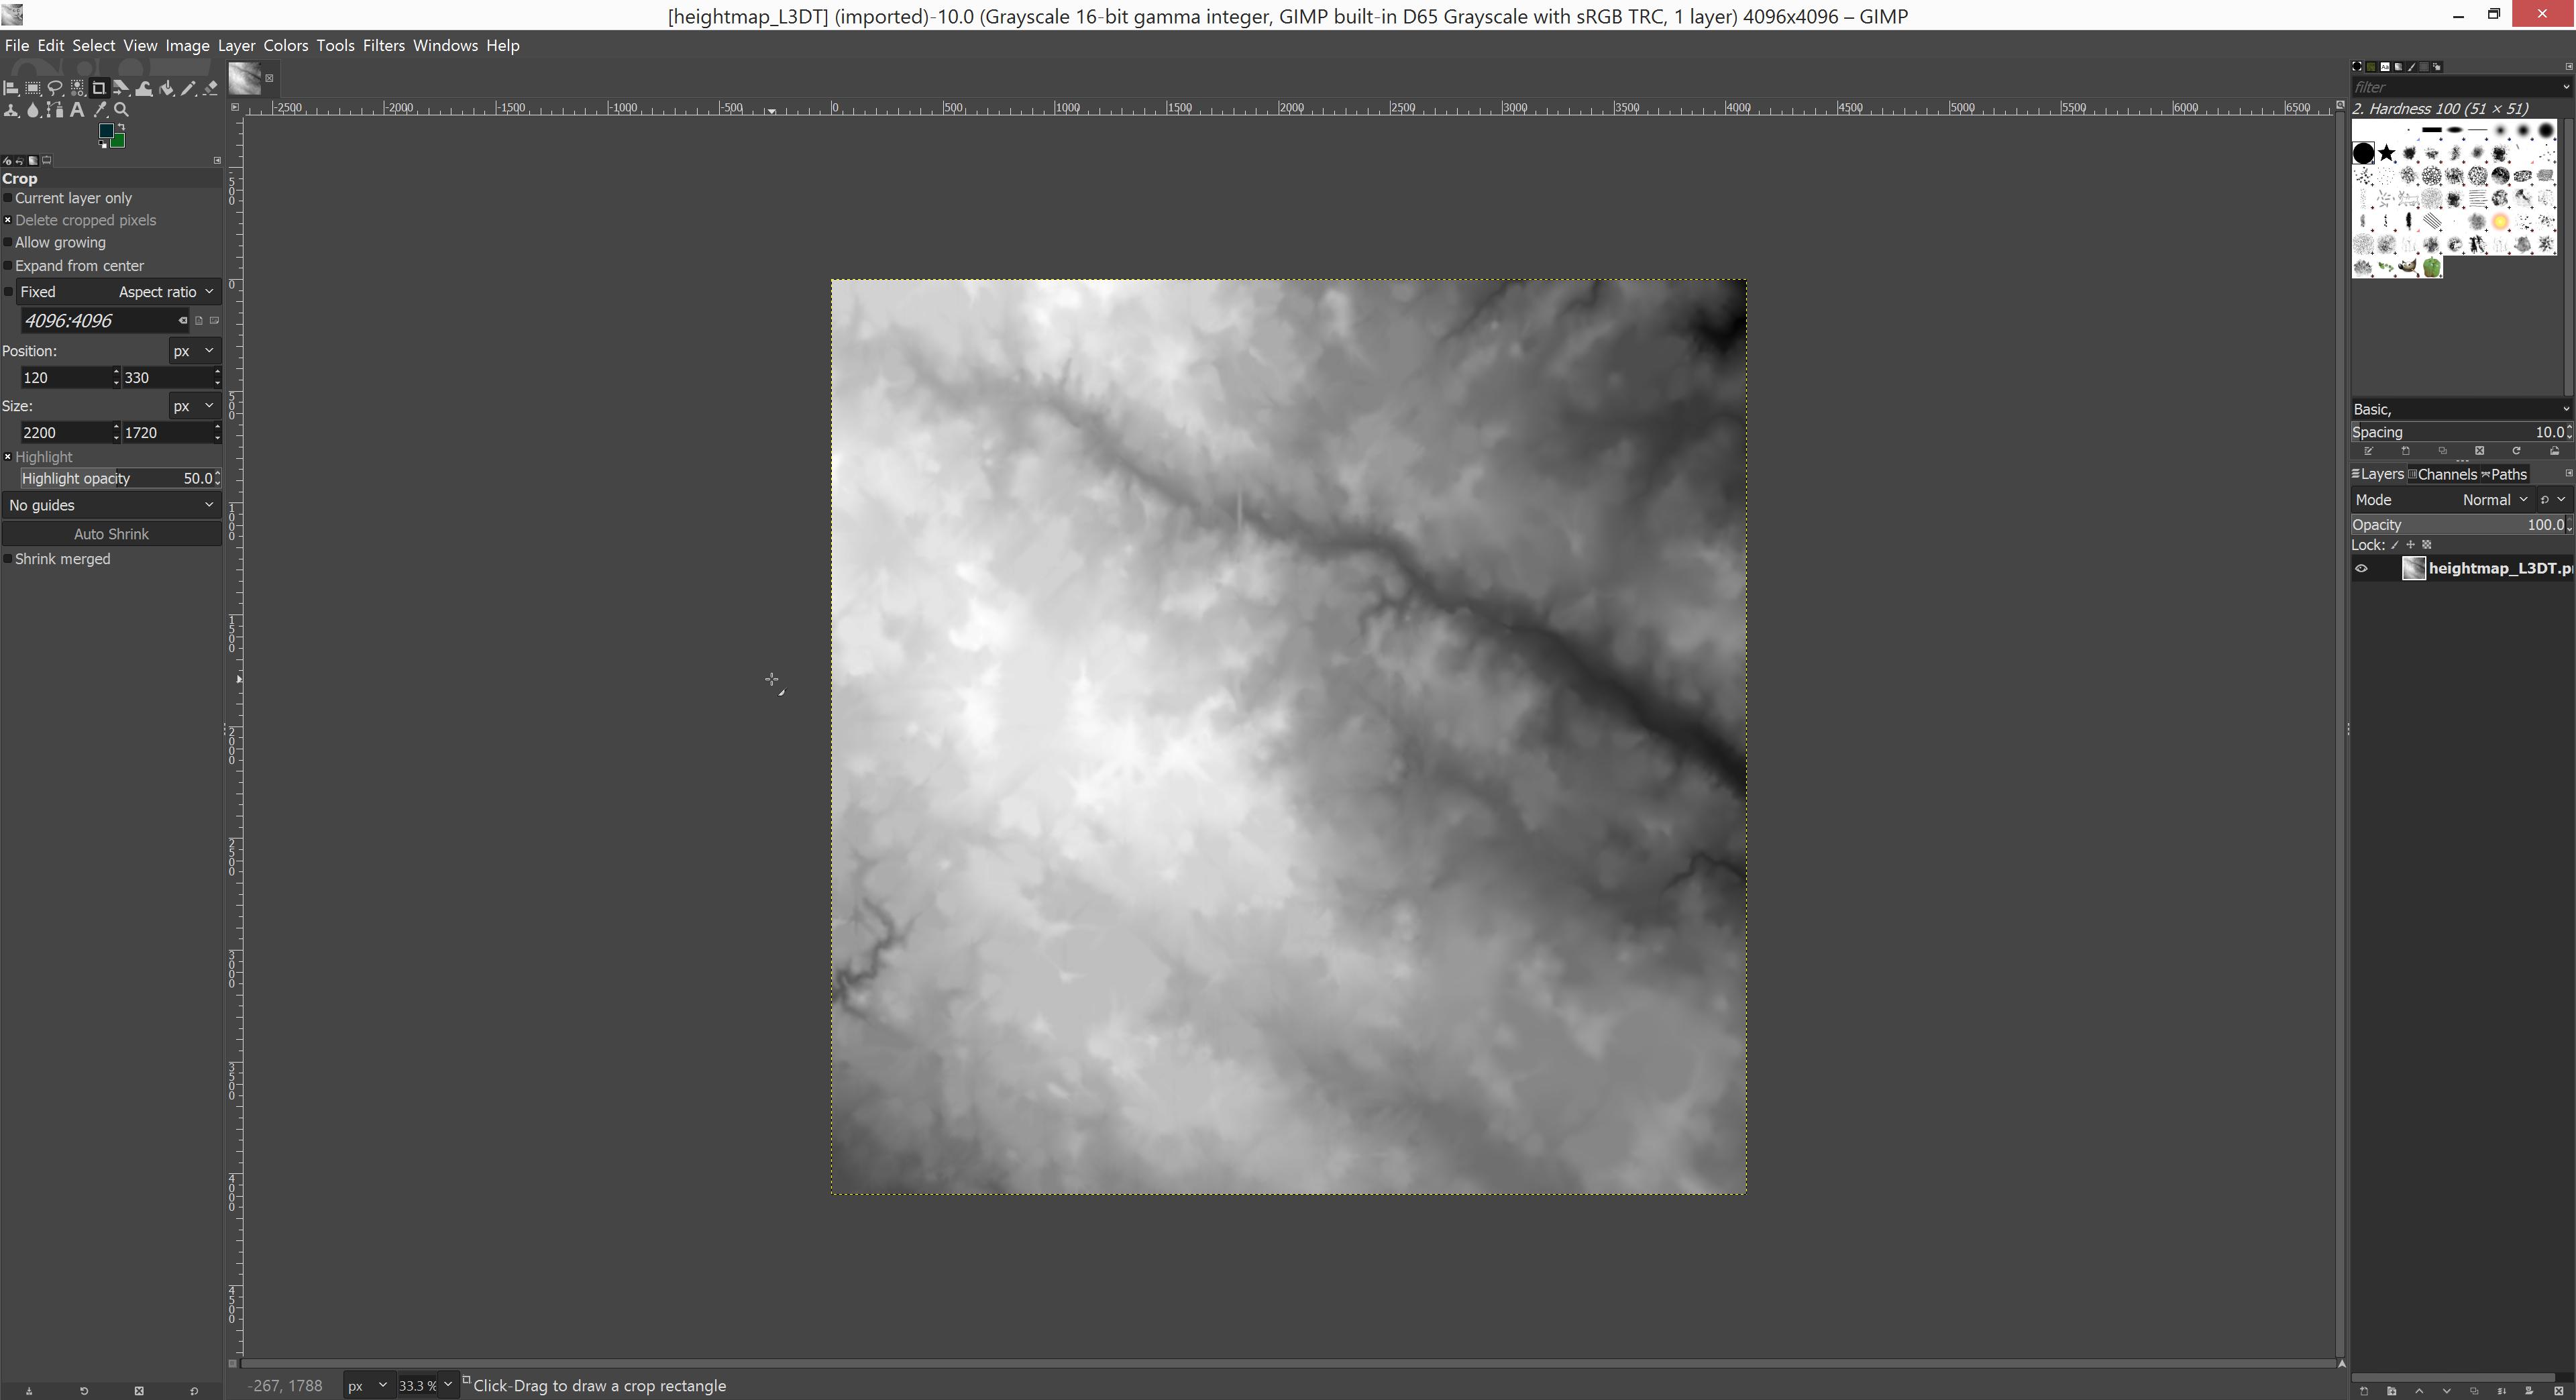
Then I rescale the image to smaller size which Precision Farming requires (blame giants for using such ridiculously low resolution image).
Use menu image -> rescale image.
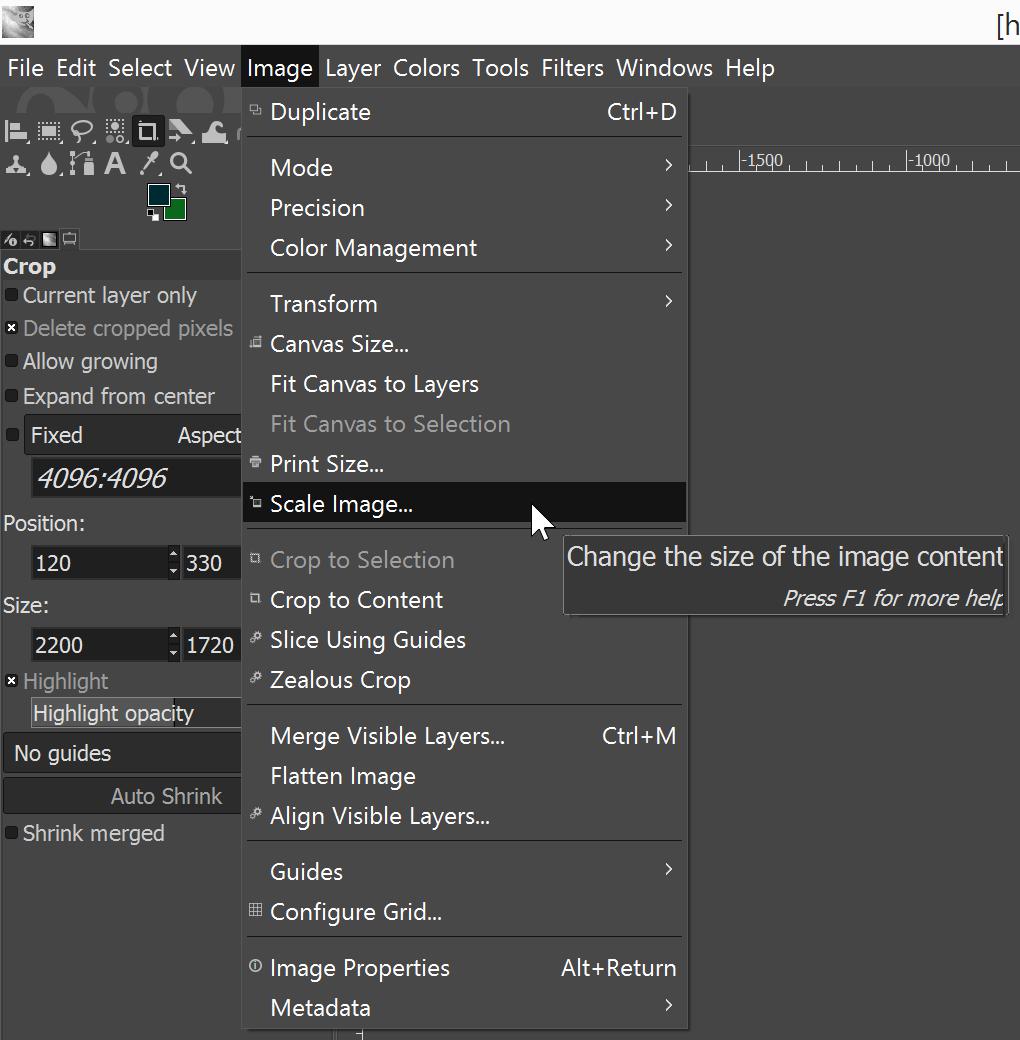
Here I have typed in 1024 width / height and chosen interpolation "cubic". Now just click Scale button and image is scaled down to tiny console loving 1024 x 1024 resolution ![]()
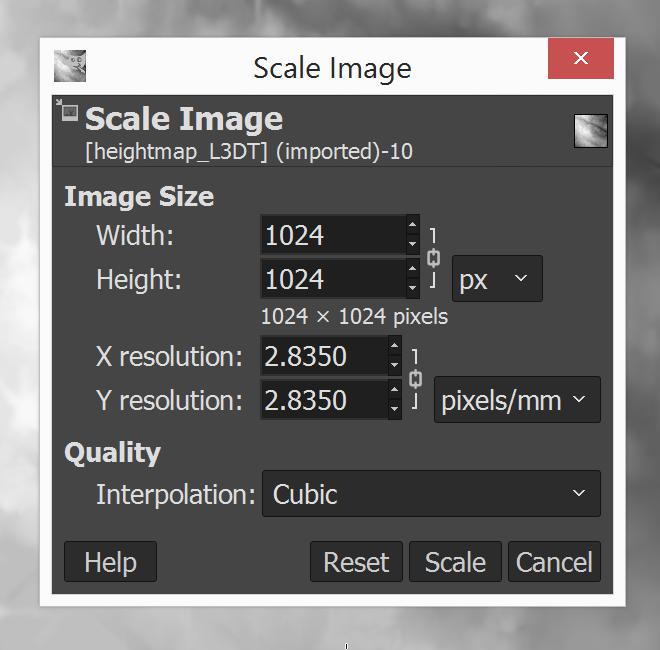
Next we need to change image mode to RGB. Use menu image -> mode -> RGB.
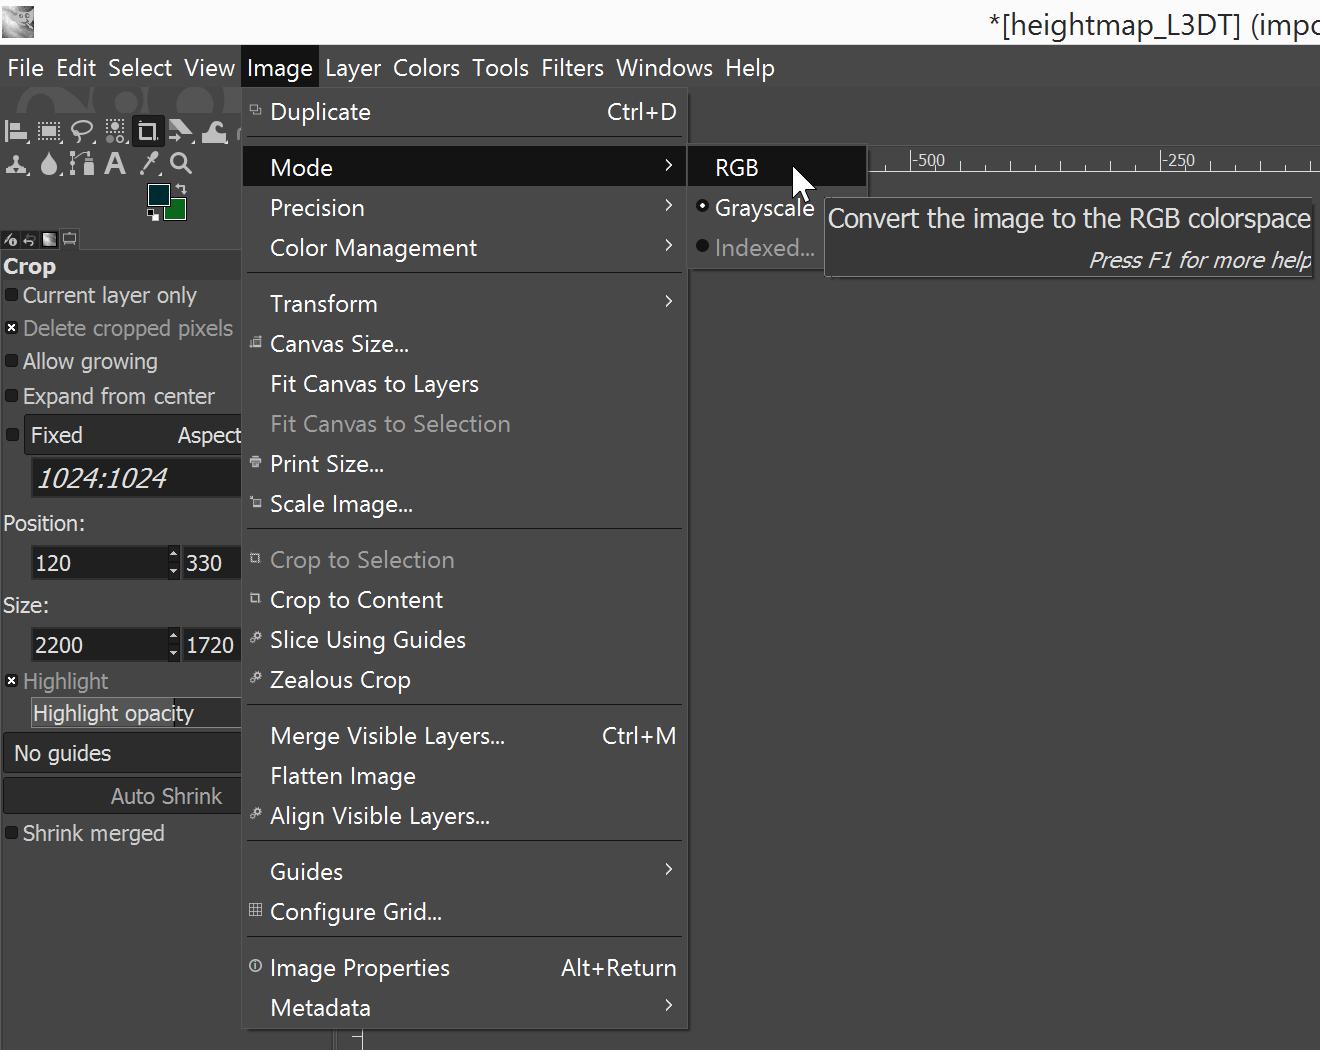
Press SHIFT-O for select by color and make sure antialiasing is DISABLED and keep threshold 15.
Then I start to select colors. I work from the best ground type available which is loamy sand up to the worst ground type which is silty clay, using heightmap elevations like lower areas are loamy sand and higher areas are silty clay.
I'm sure it doesn't work like this in real life but this is excellent automatic method of creating interesting looking soilmap image.
For tutorial purpose I have enlarged heightmap image to GIMP "fit image in window" using SHIFT-CTRL-J so we can see our selections and colors better.
So first I click most darkest area in our heightmap image.
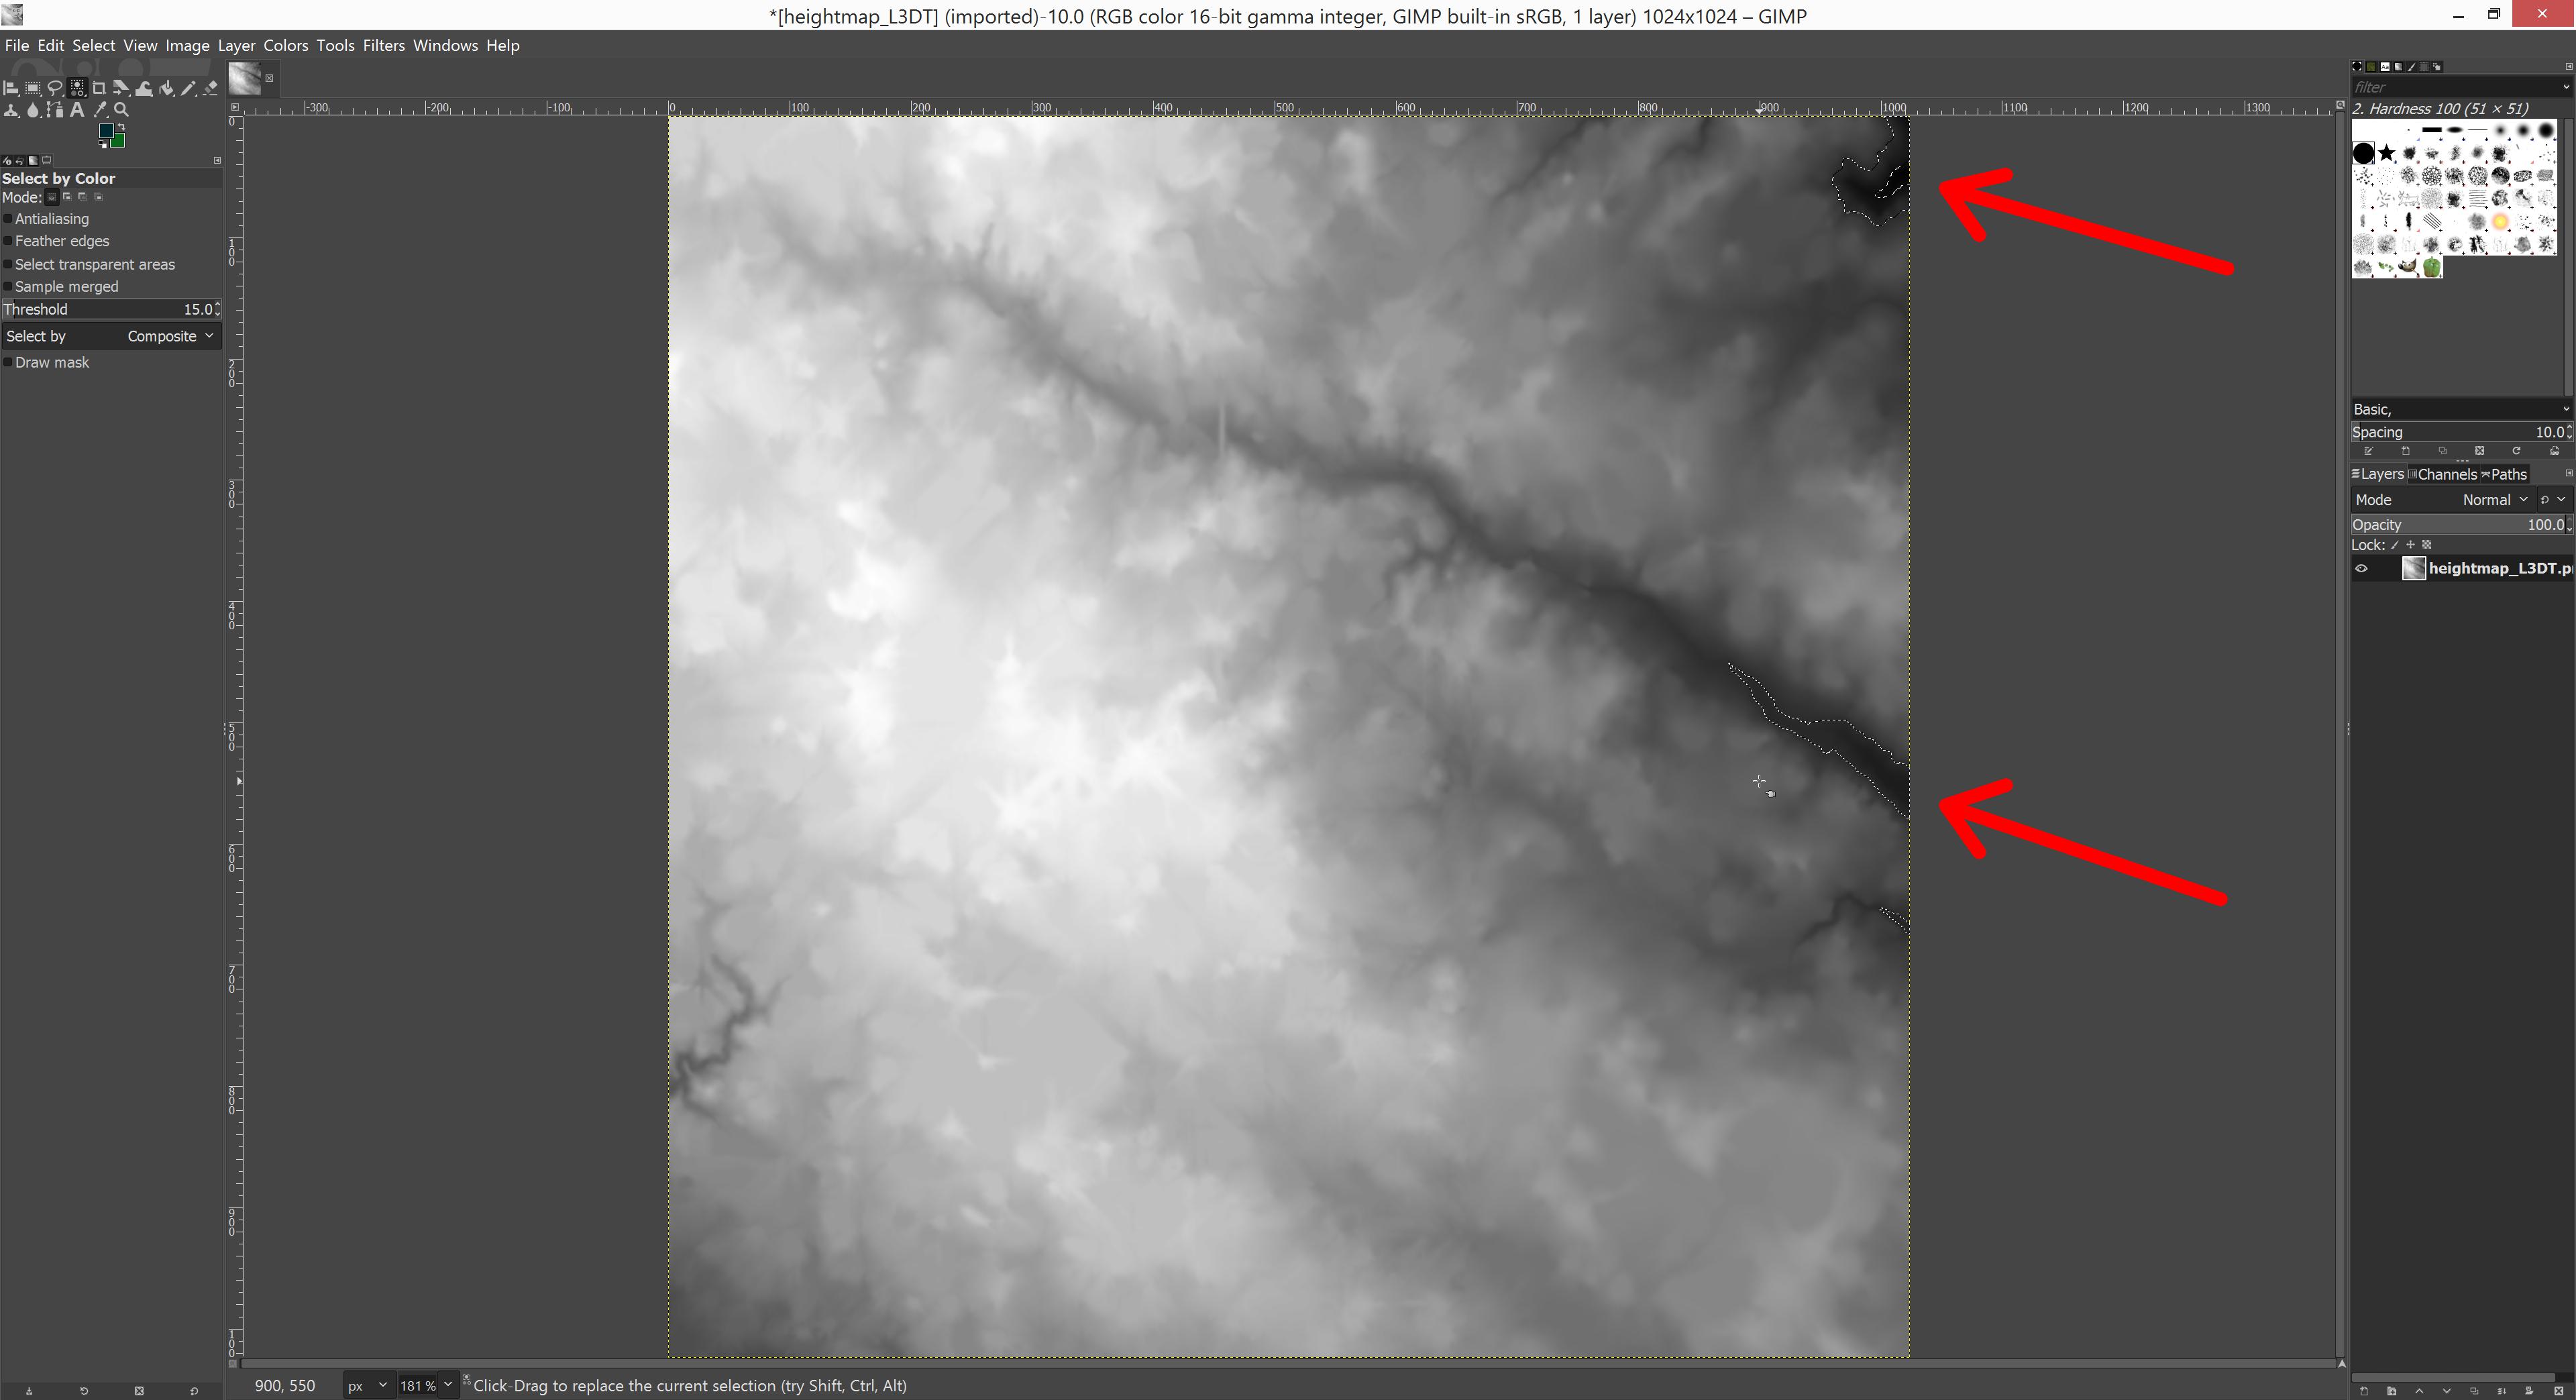
Hmm okay not much selected in this heightmap, yours might be different, its impossible to cover all images which is obvious, I'm currently using PMC Iowa Garden City 8km terrains original L3DT exported heightmap image.
I want to choose much more loamy sand areas, so I hold down SHIFT and LMB click to the darkest areas around my selection, basically I follow that dried up river bed towards north west. Holding down SHIFT with select by color mode active adds the selection to your existing selection.
You really need to click this next image open to a full resolution as the thumbnail wont show the selection.
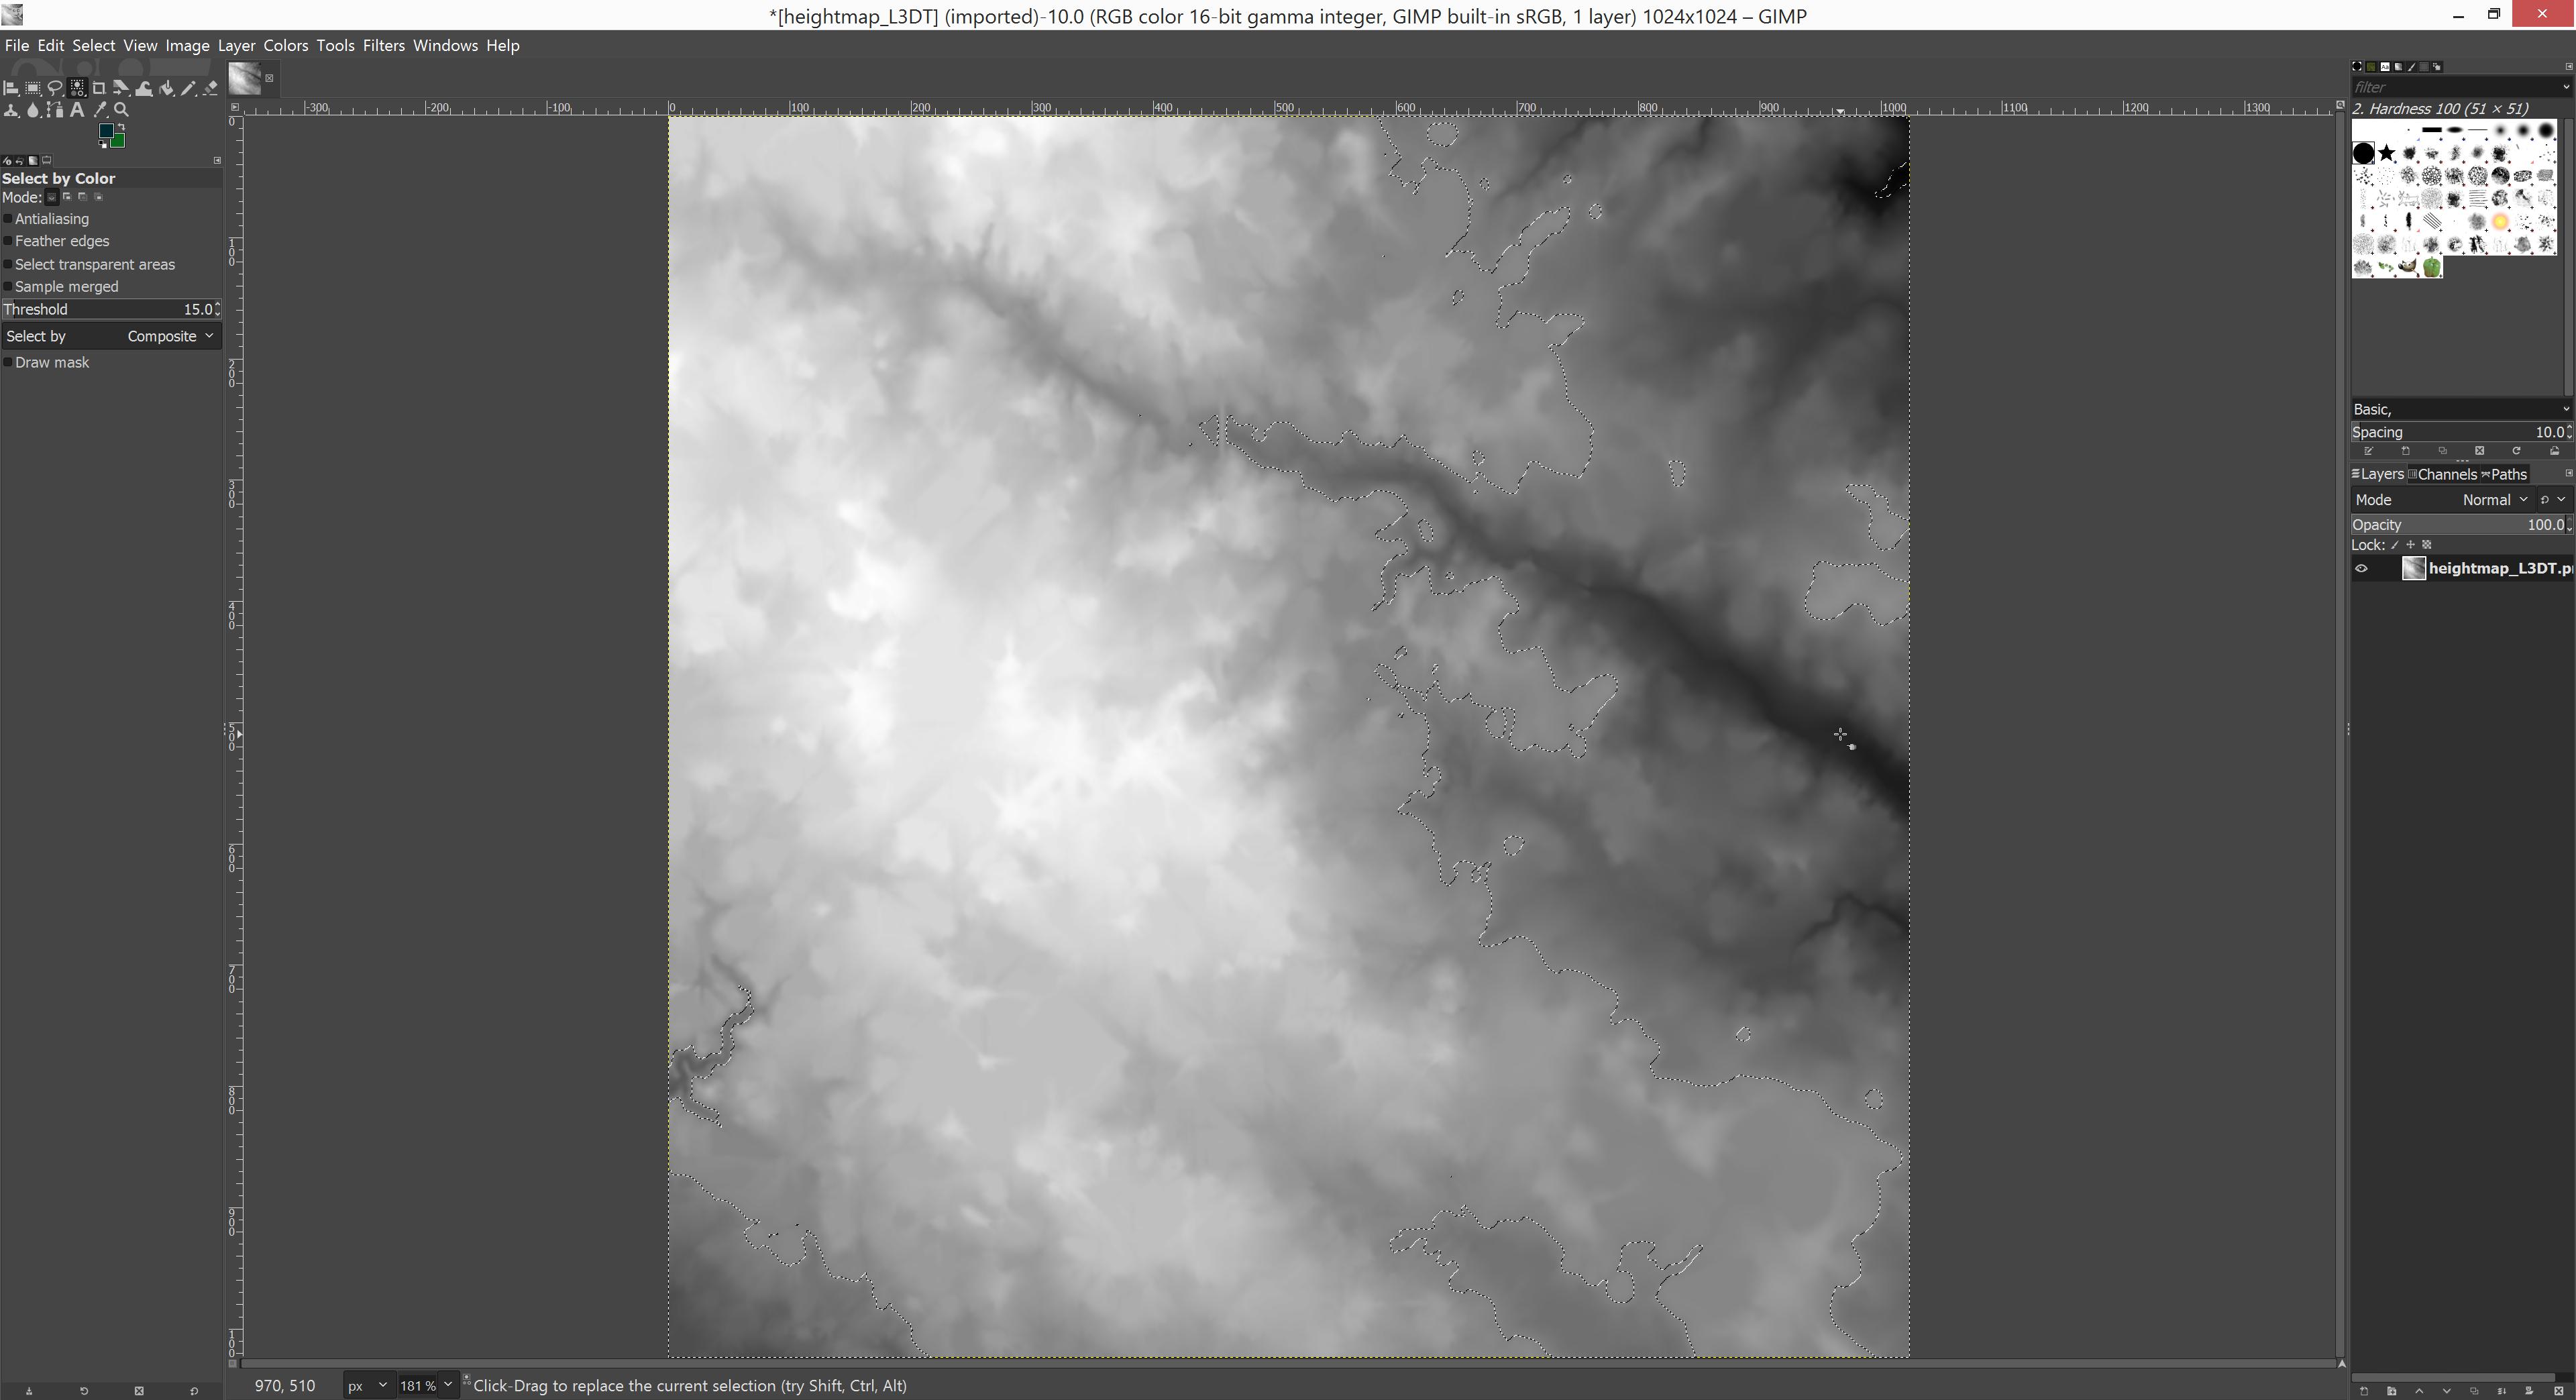
That looks like a nice loamy sand soil type area. Now we start to paint it.
I click the color palette icon thing which I havent figured out good name for, there is no tooltip etc so just look at the pretty picture heh.
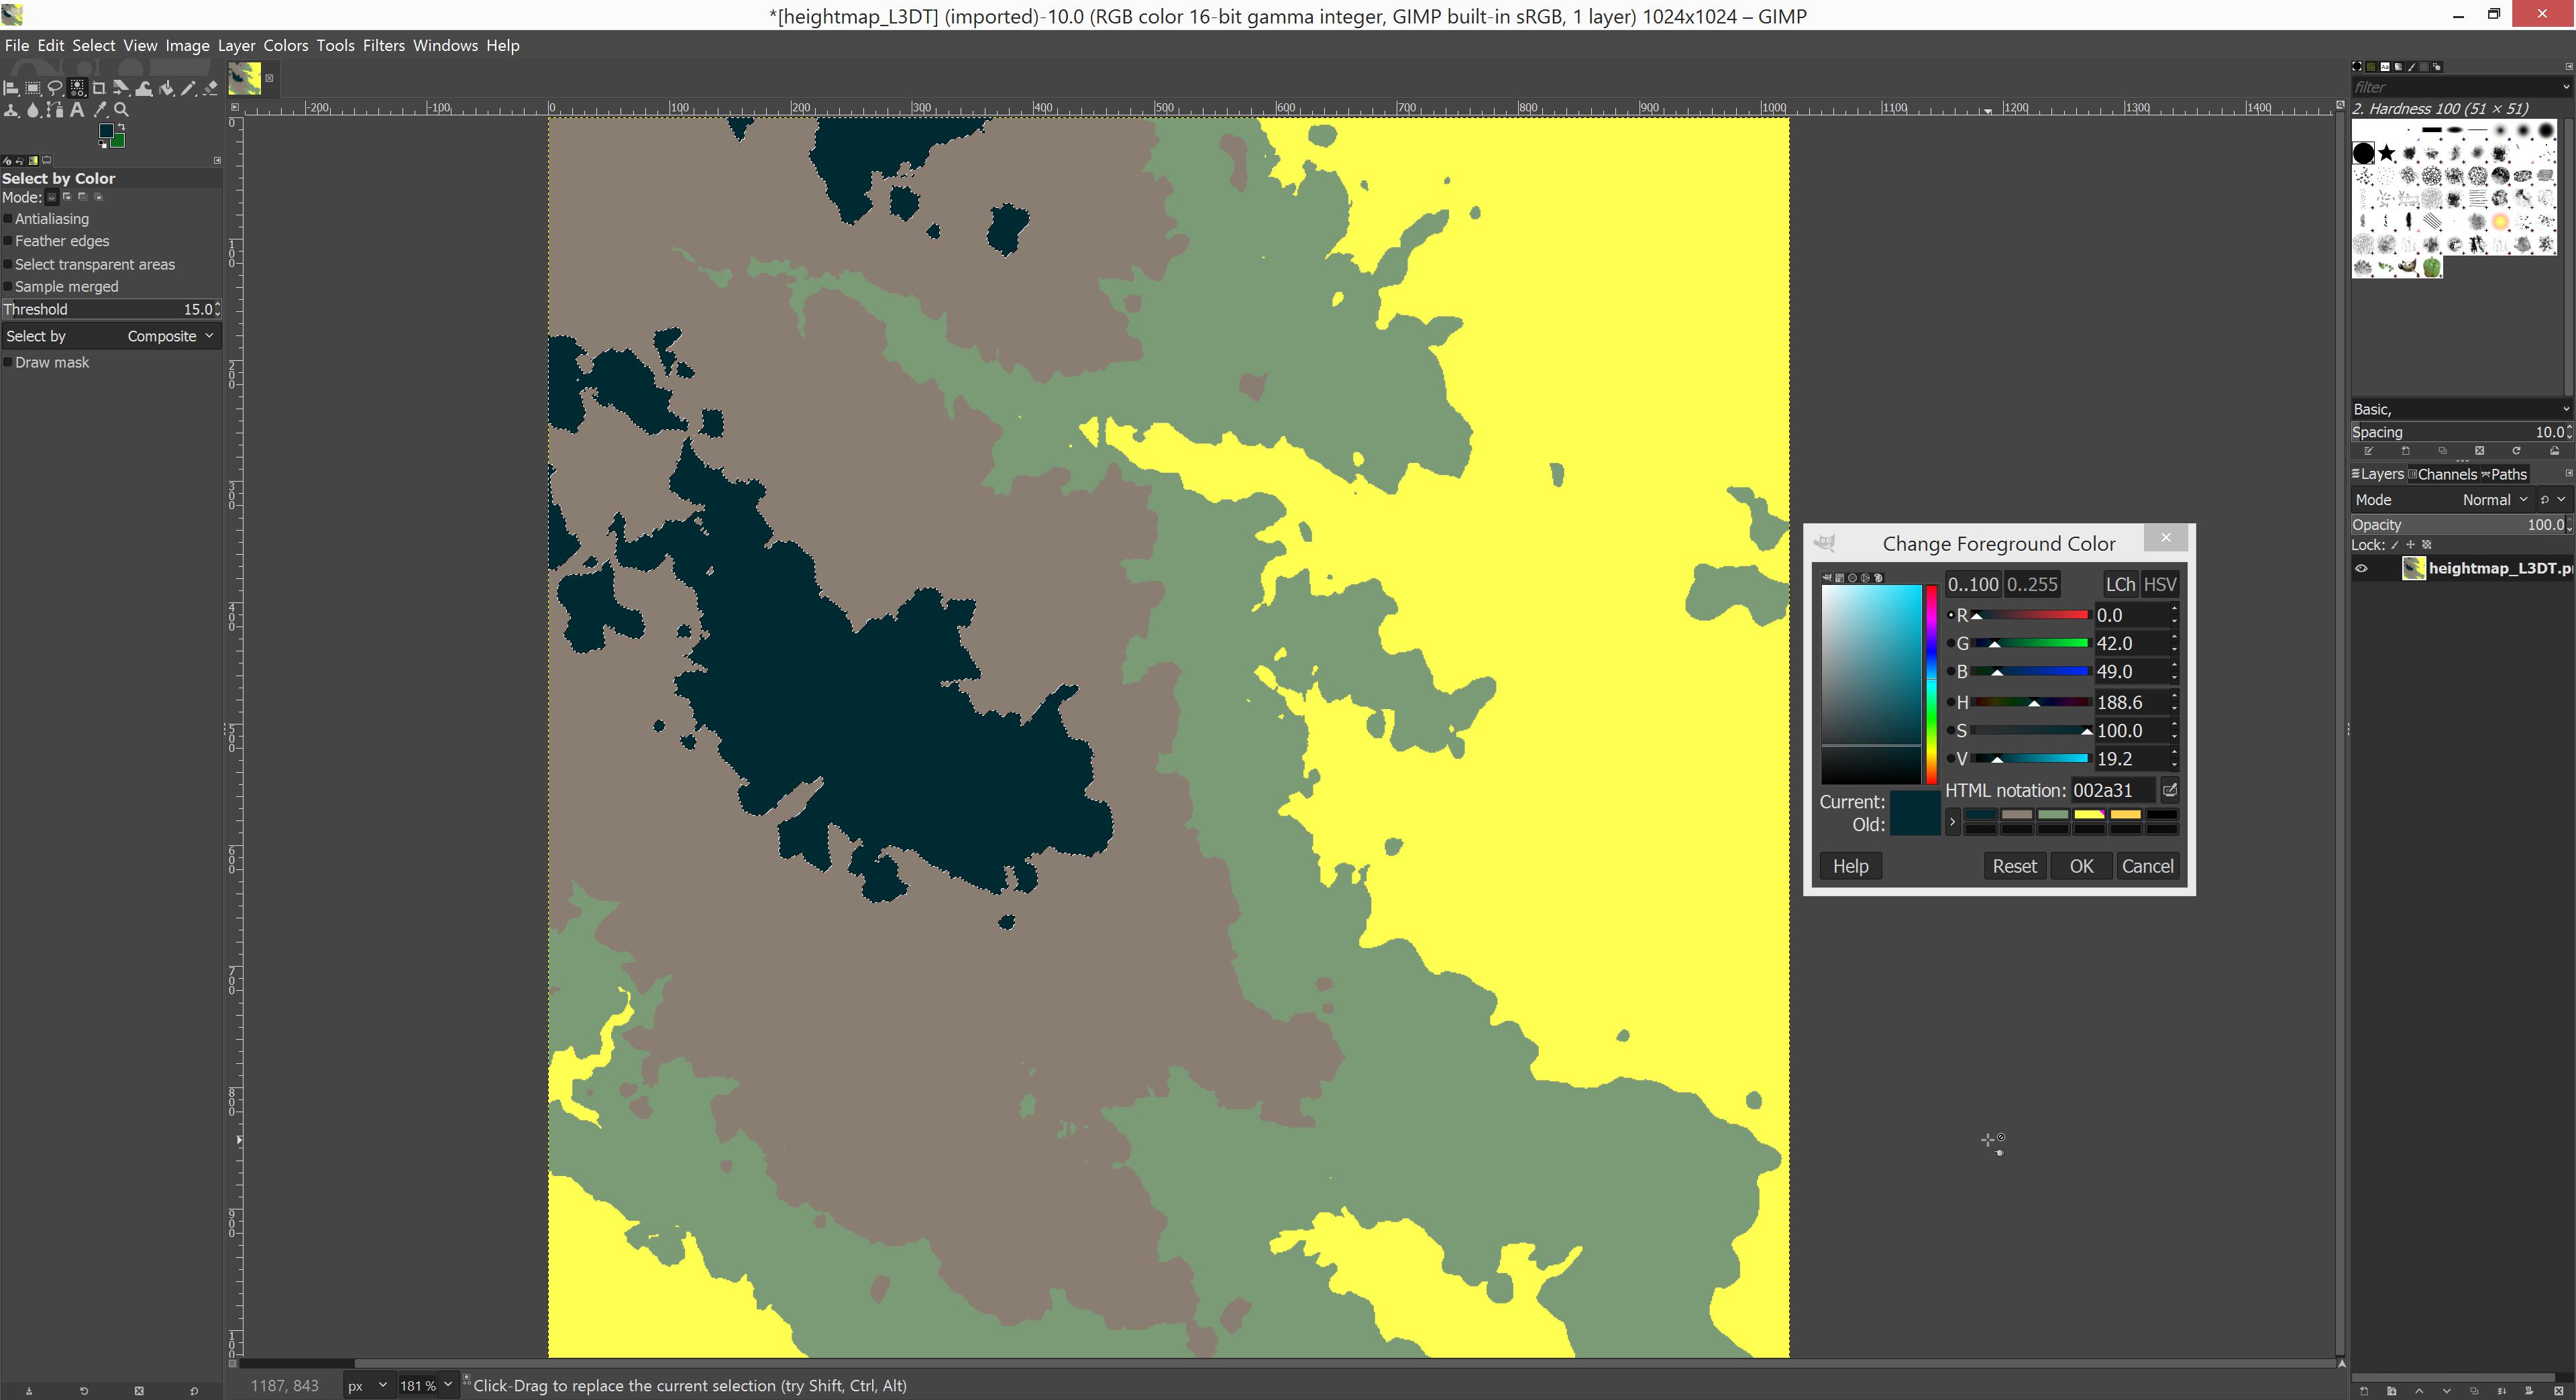
Click that and it bring up the actual color palette change foreground color dialog. Here we must first make sure the two buttons are activated, see below.
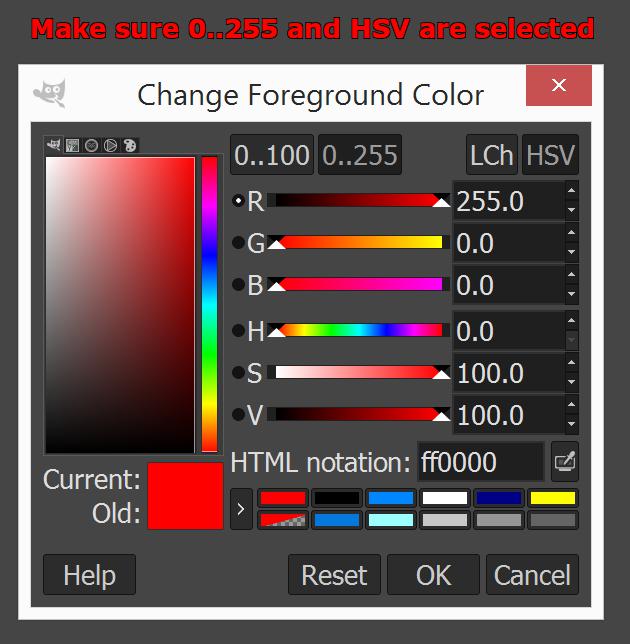
You must click 0..255 and HSV buttons so they turn dark, active. If you do not, then GIMP uses some weird RGB colors.
Using our above human readable colors we make loamy sand as RGB 254,209,80 as seen below.
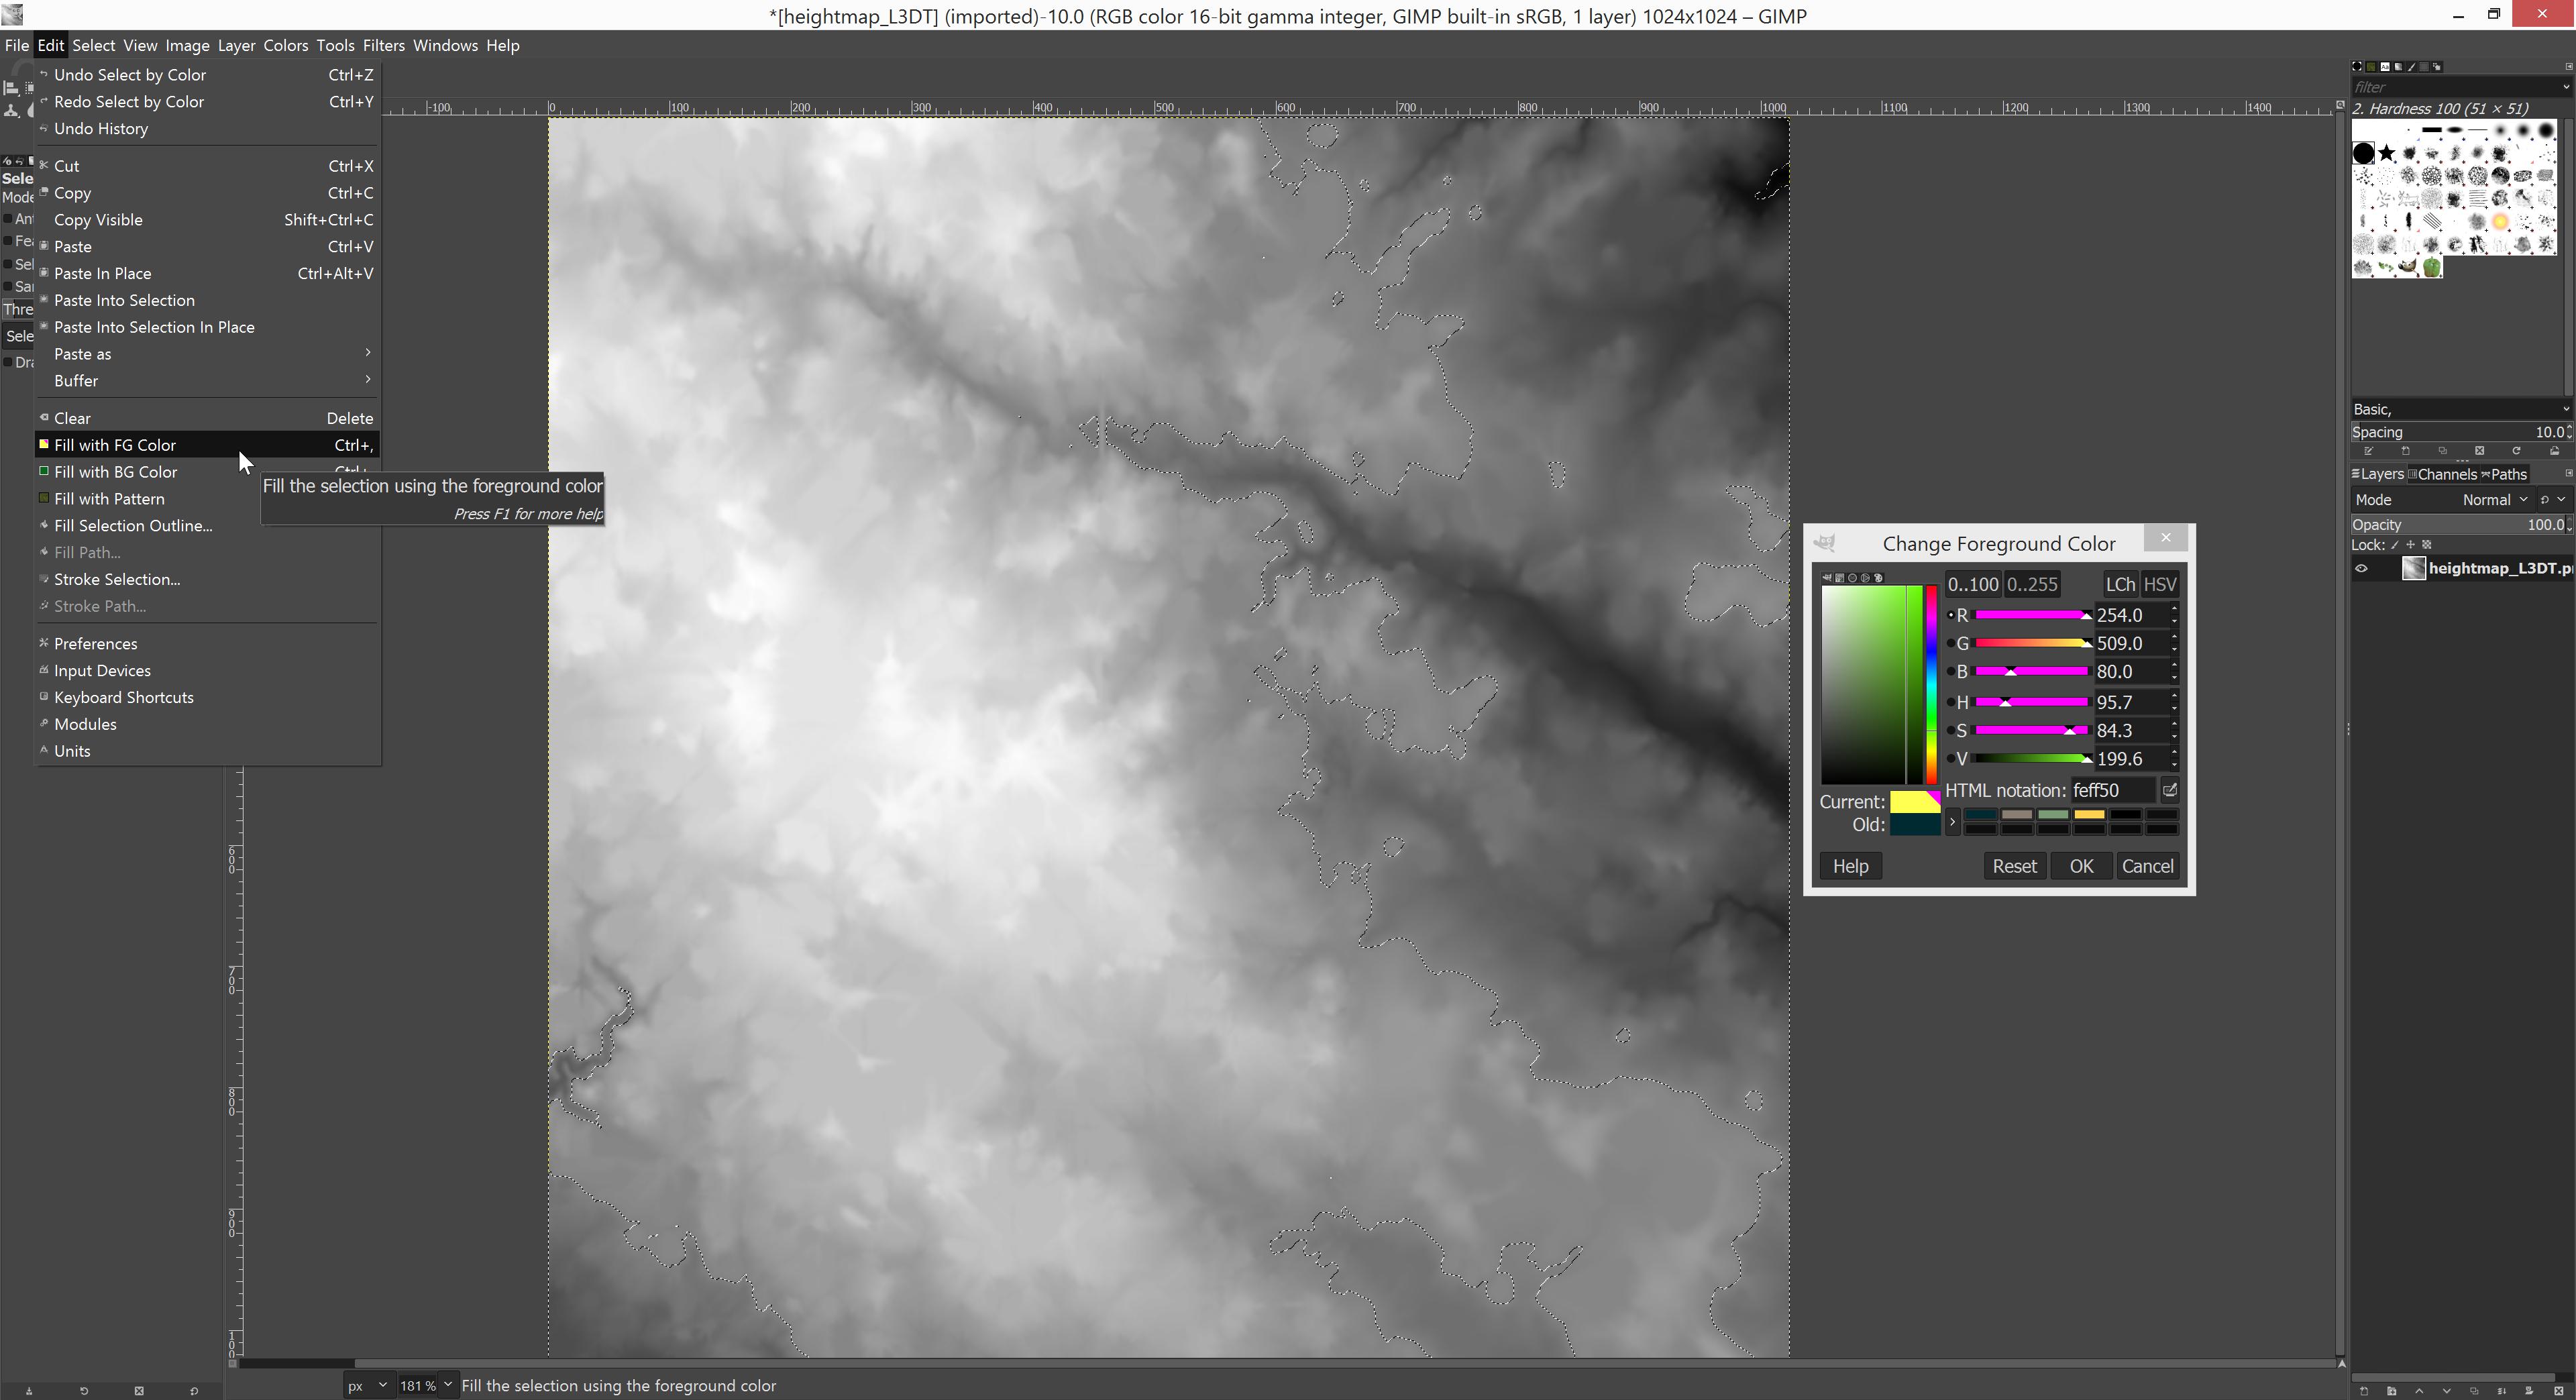
Then either use menu edit -> fill with FG color, or use simply the keyboard shortcut CTRL-, (control and comma). This will paint fill everything withing our image selection with the current color. See above image.
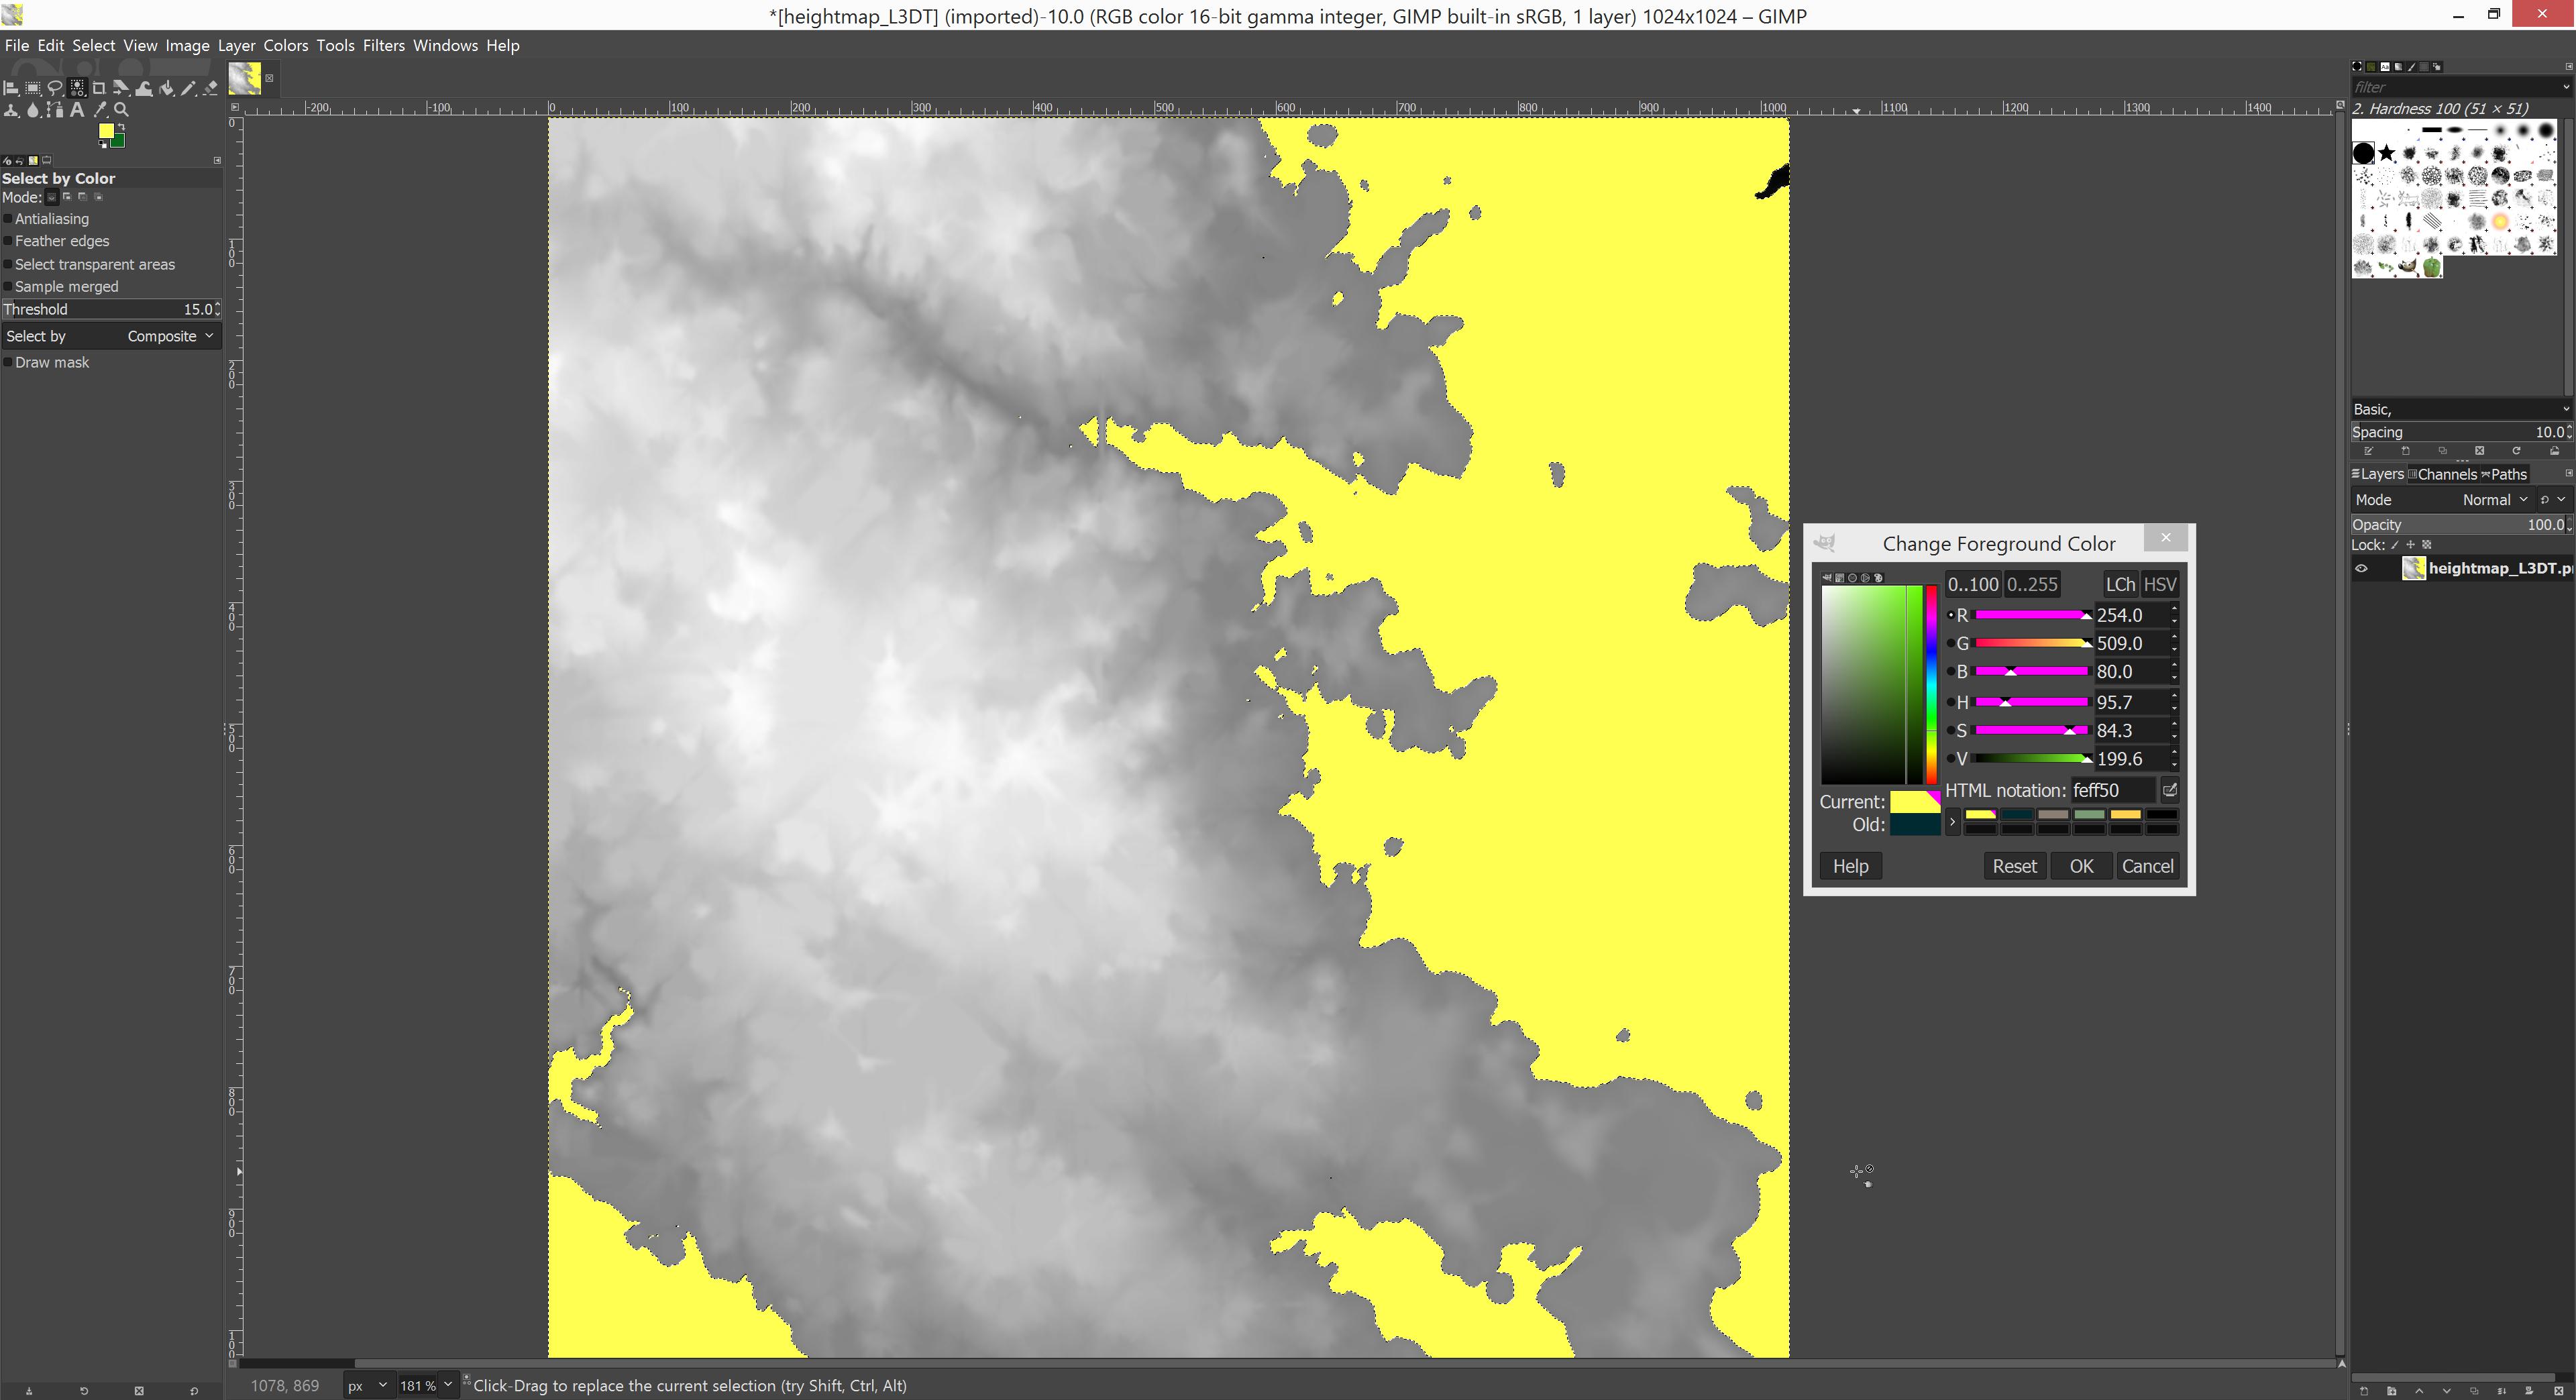
Whee, cool eh? ![]()
First precision farming soil type color has been painted, excellent.
You might notice in above image that in north east corner area there are one empty black spot, apparently the black dried up river bed I started to click on was not actually the lowest point of the heightmap (meaning blackest). No big deal, I'll just LMB click that now to select it and then hit CTRL-, again to fill it.
Note: I'm hitting LMB alone not SHIFT, so it makes a new selection. You see it been painted on the next image.
Next we do one soil type above loamy sand and that is sandy loam (yes flipping these words around confuse me too, send help) ![]()
So I'll type in new RGB color to "Change Foreground Color" dialog, this time Sandy Loam's 123,155,118. I wont be screenshotting it as, well its just numbers in a dialog, you see it on the next image.
Then I do another soil type selection, I use SHIFT-CTRL-A to unselect everything as I still had that small black spot in NE corner selected. So I choose the next darkest color in the heightmap, click it once to select first area, then use SHIFT-LMB clicking to achieve good area selection.

Nice selection. Okay then just paint fill the current RGB color into our selection with CTRL-, again, boom, done.
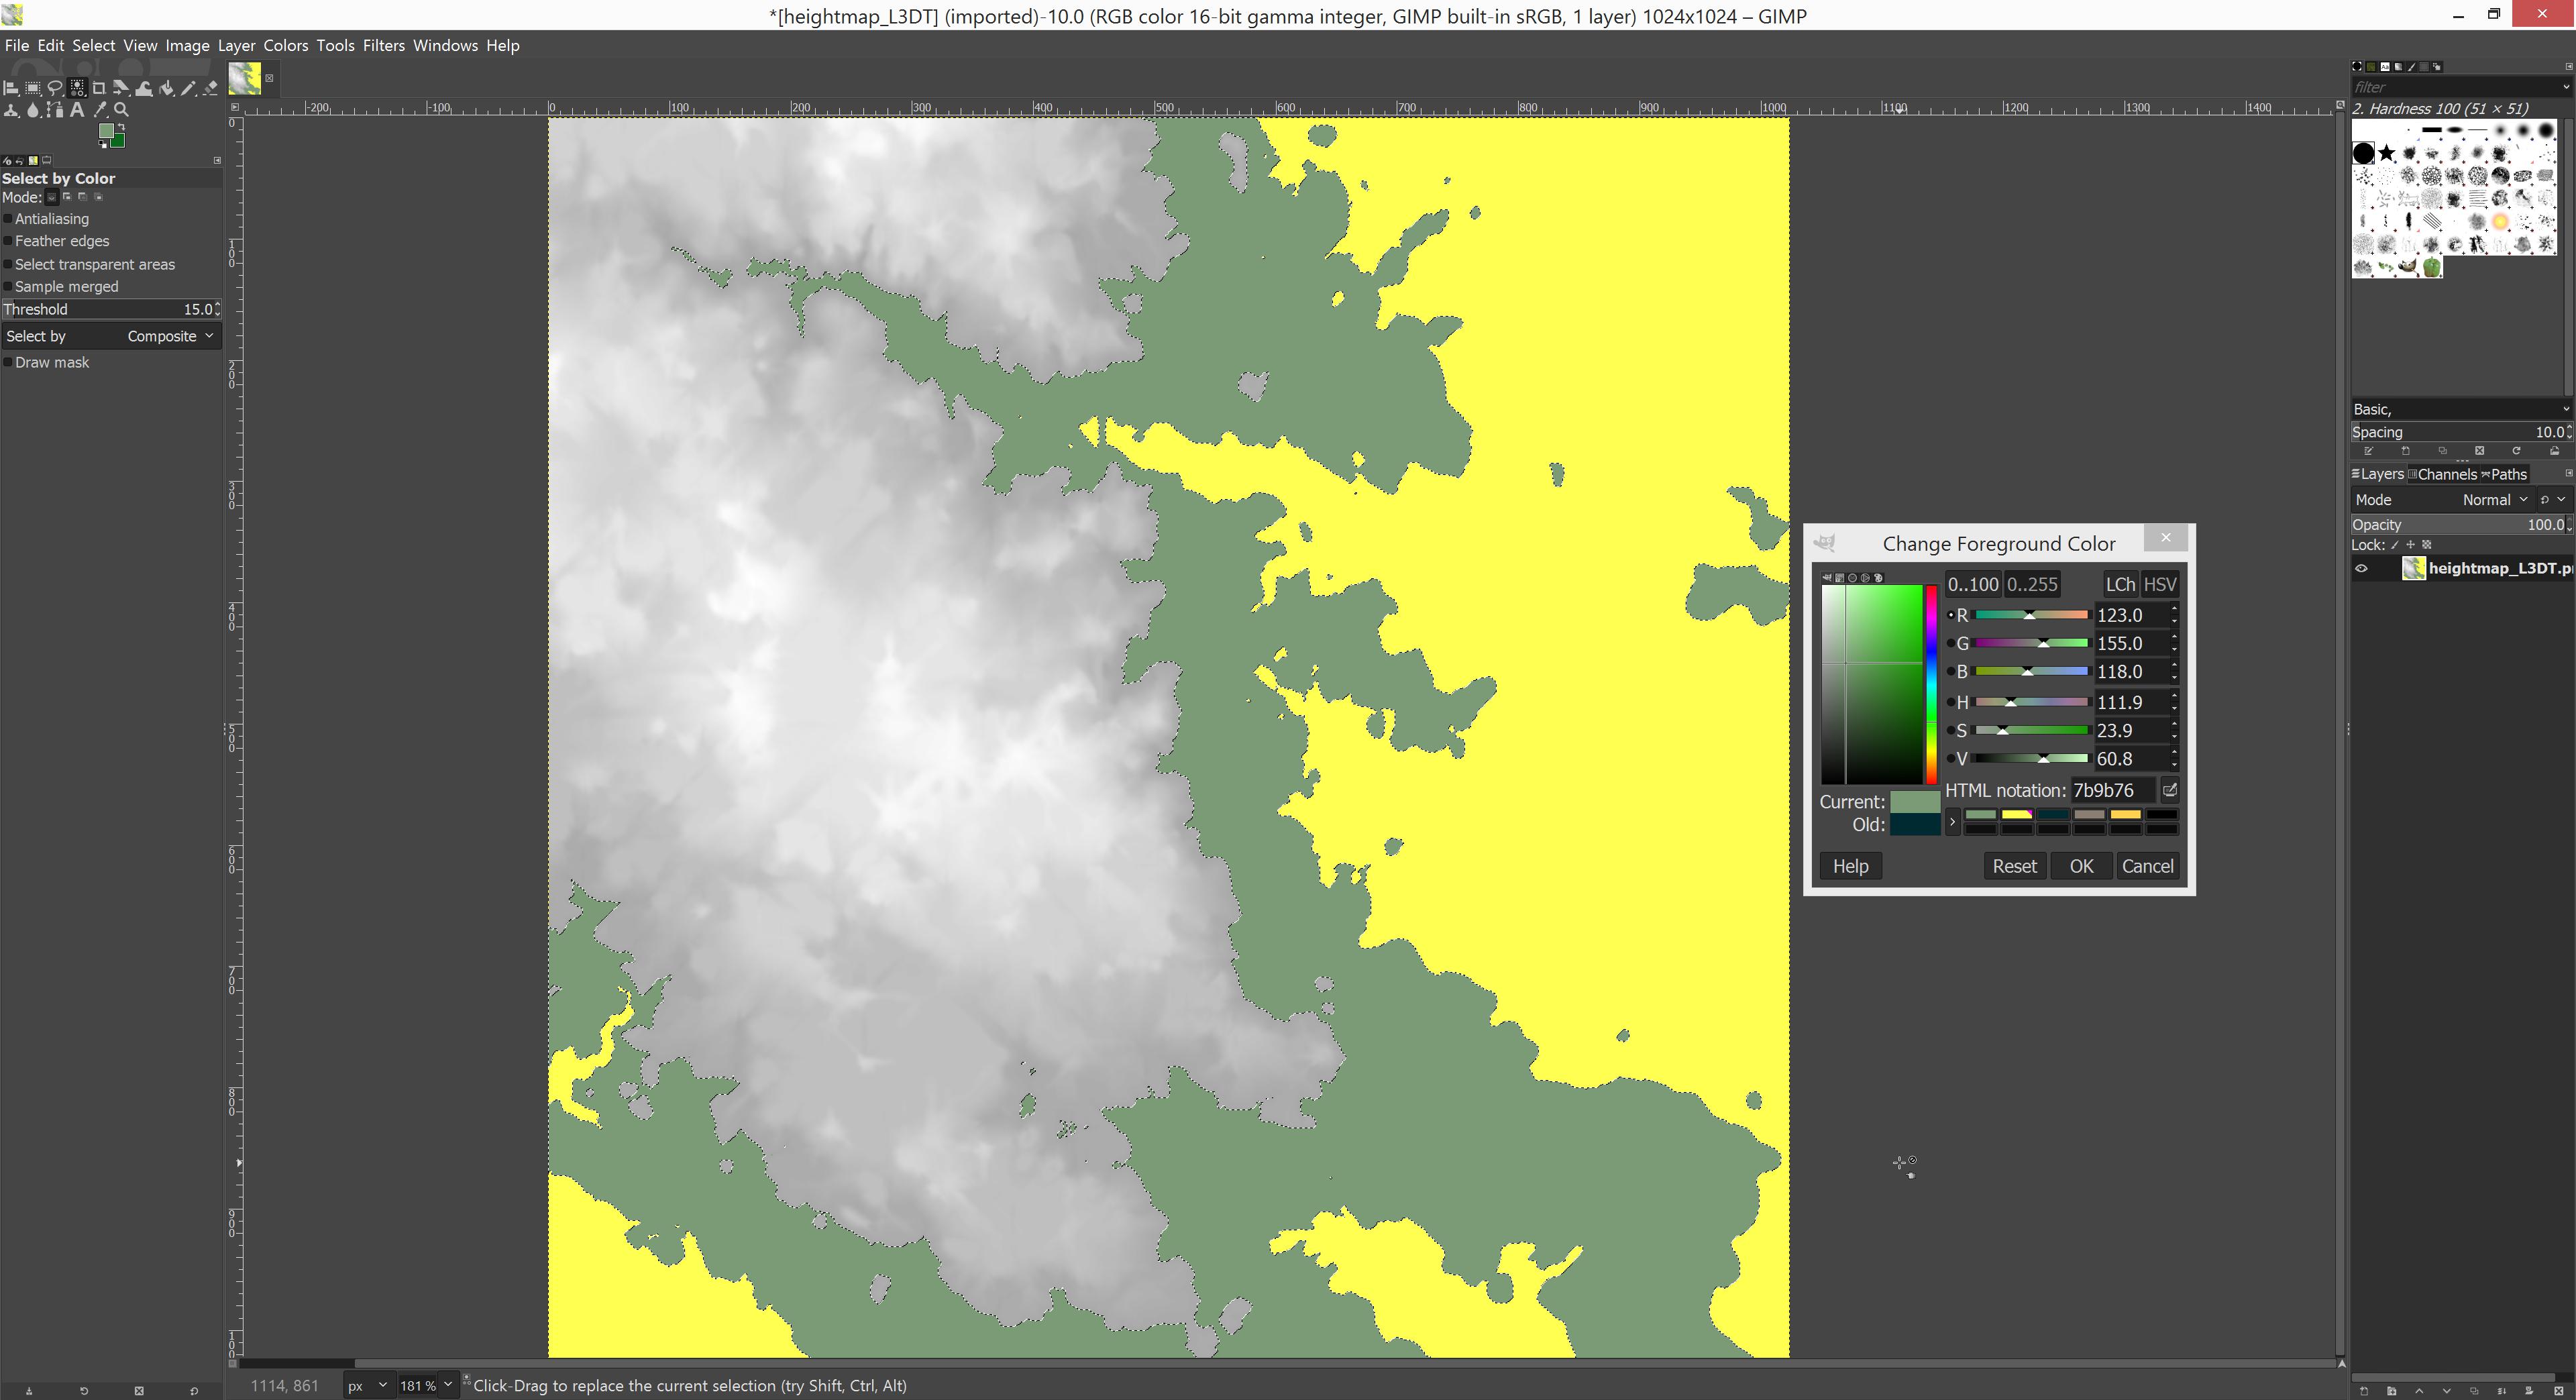
Looking good, lets keep up painting some of them colors, two more soil types to go.
Next we do exactly the same thing, type in Loam 138,126,114 RGB colors to color palette, unselect previous selection and make a new selection, I wont be screenshotting it this time as you can see it from the painted image and then paint it again using CTRL-, keys.
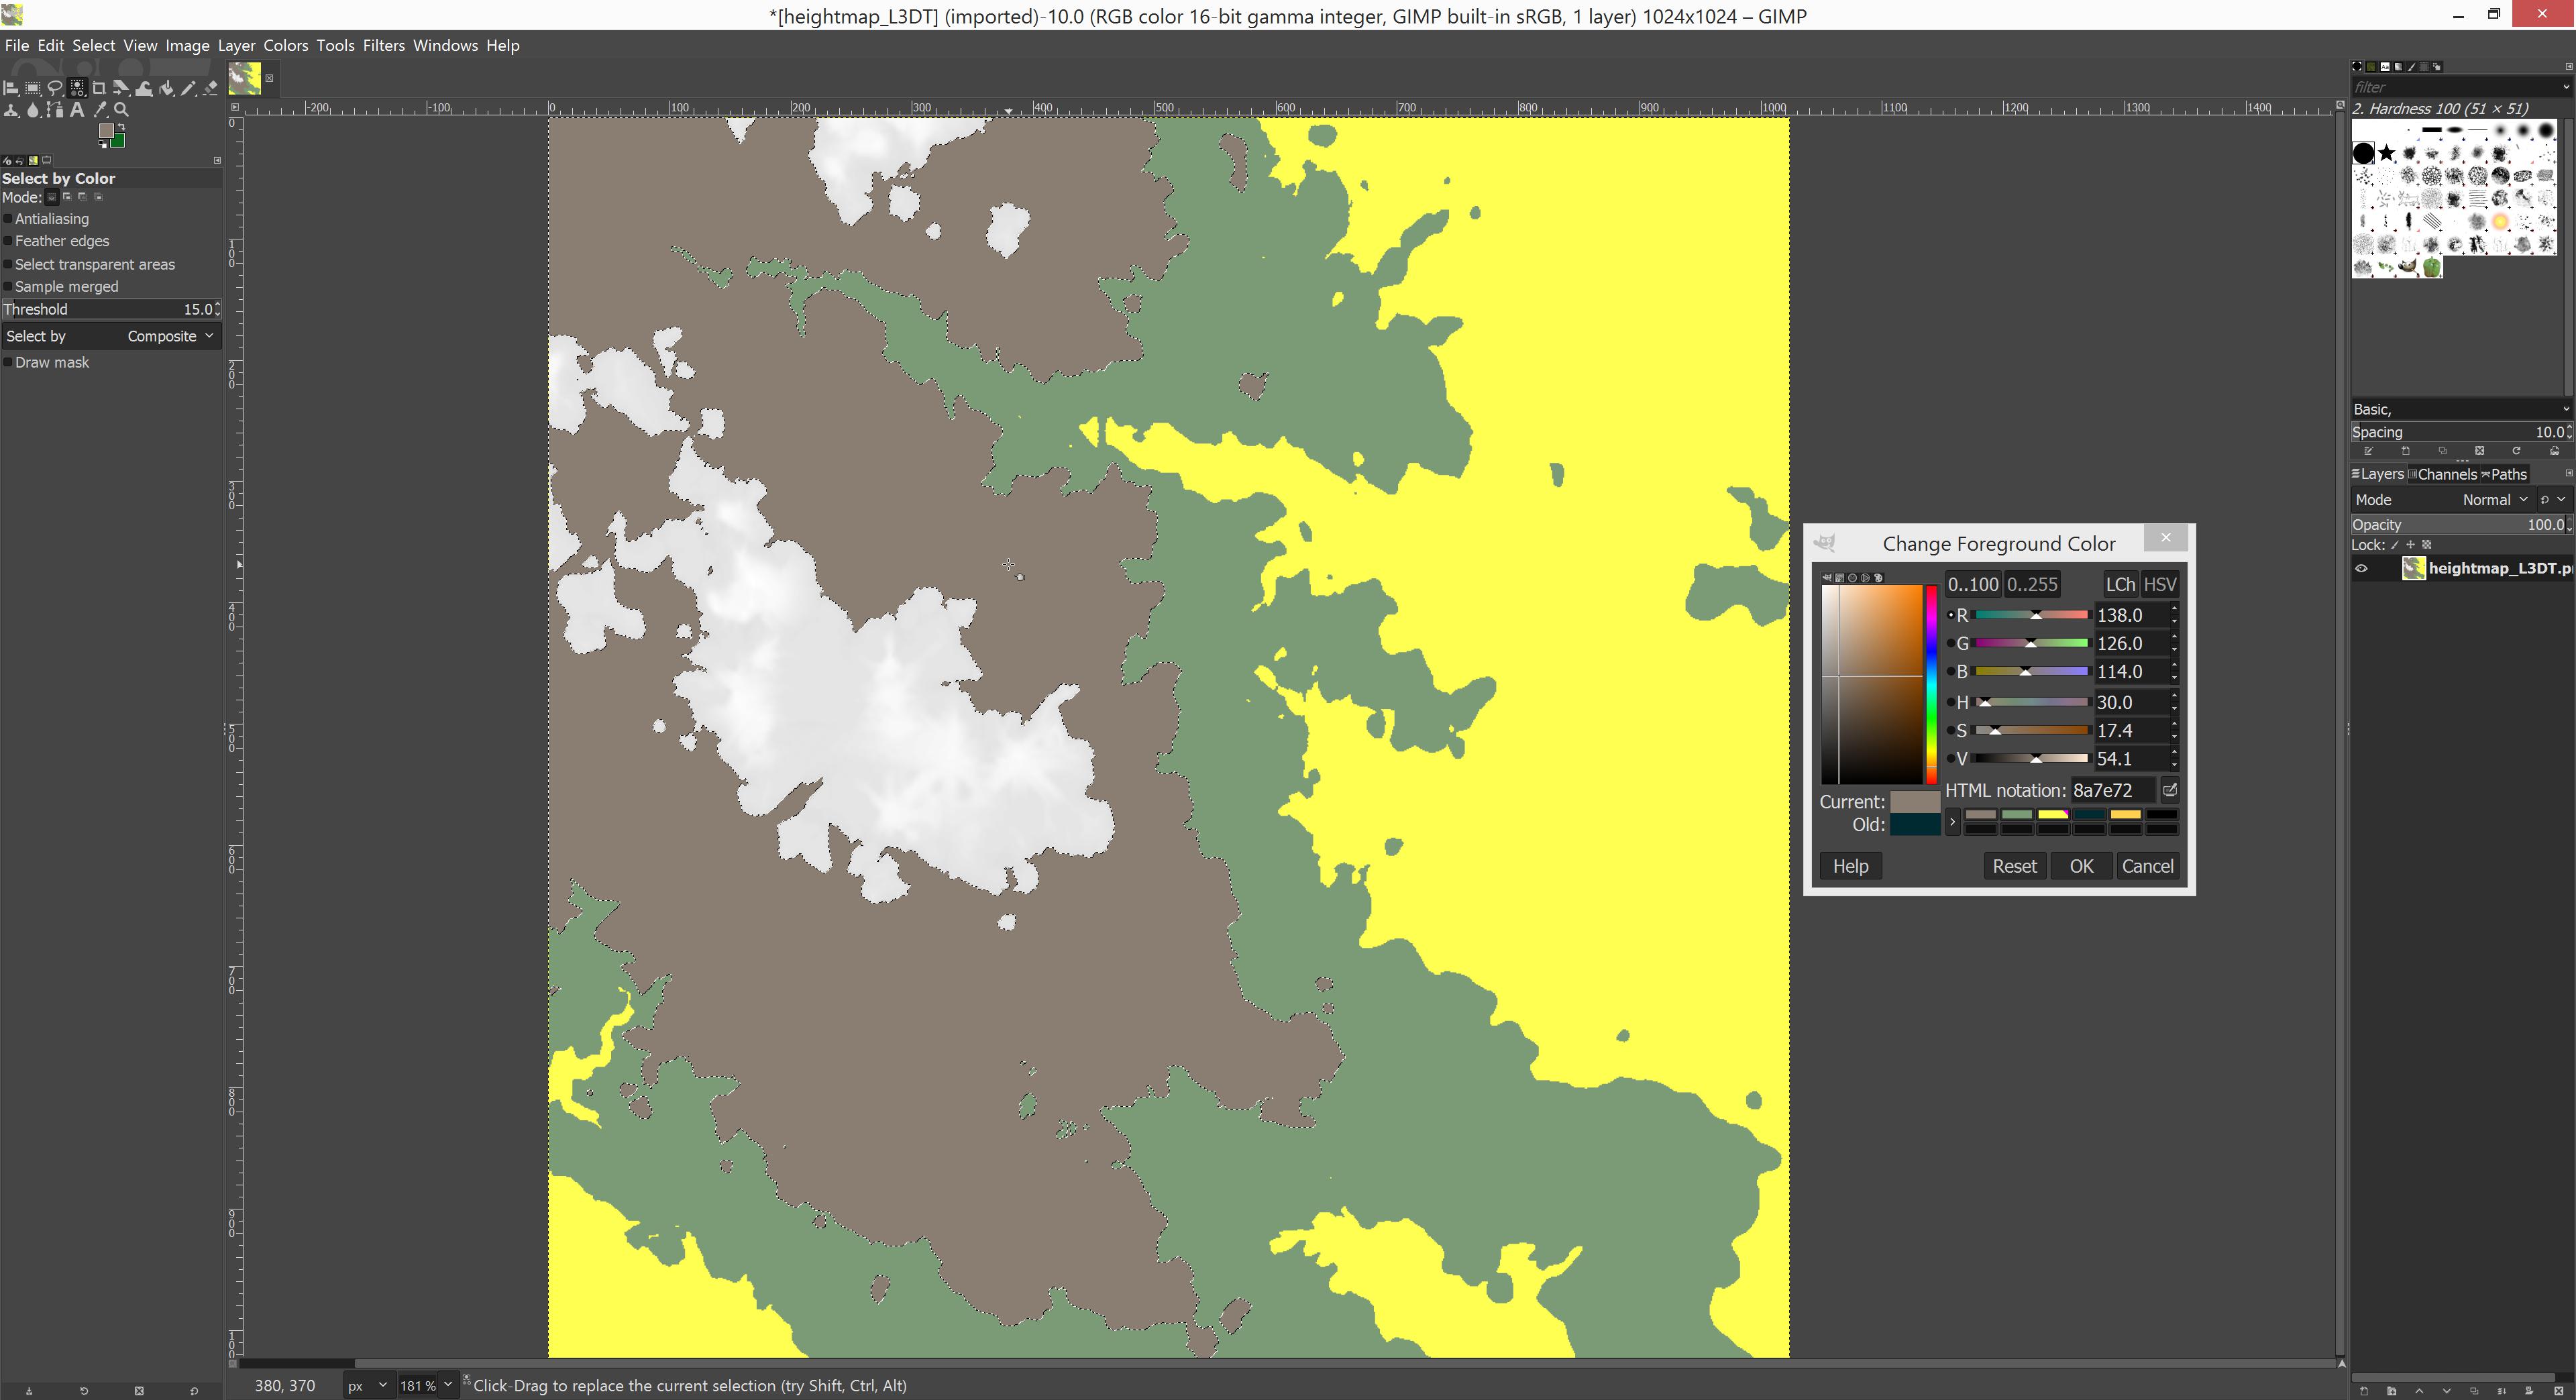
Nice. One more soil type to go, exactly the same procedure for Silty Clay 0,42,49 RGB colors and whatnot.
Boom, there you go, all four precision farming soil types painted in, great! ![]()
Now I close color palette dialog as its not needed anymore and unselect the last selection with CTRL-A.
At this time we save GIMP native XCF image of what we have painted, we wouldn't want to lose it. Hit CTRL-S to save and when GIMP asks for filename give it XCF extension, personally I use GIMP_precision_farming_soil_types.xcf filename but you can choose whatever proper filename you want.
Final step in GIMP is to export this image and for that we MUST use GIMP_PF_soilmap.png filename. So hit SHIFT-CTRL-E for export image, and type (or copy-paste) that filename exactly, of course make sure you wont do duplicate .png.png extension to the exported image heh.
Now you can close current image by CTRL-W.
Next we are using graphicsmagick to generate GE readable PNG image automatically. Trust me there would be so many steps to jump through if you wanted to do all this in GIMP, graphicsmagick is beautiful as its single click of a button to run this BAT file.
From below grab the code and save it to _run_graphicsmagick_create_soilmap.bat (I might add actual .bat file to download if people find making new files in windows difficult?).
Then simply double click _run_graphicsmagick_create_soilmap.bat so it runs and... you see some text on the screen like below.
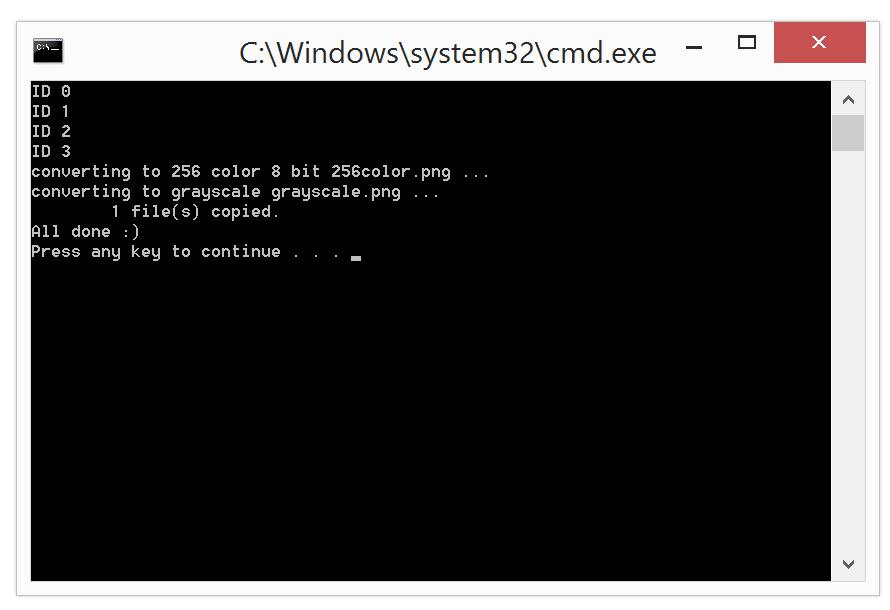
Soilmap.png image has been created for you if everything went well, now you are ready to bring in this image into GE.
All done, congratulations for painting your Precision Farming custom soilmap image! ![]()
GraphicsMagick Create Soil Map
Requires GIMP painted human readable (see above) RGB colors using GIMP_PF_soilmap.png in the directory. This batch file uses GraphicsMagick to convert your PNG into GE readable format.
_run_graphicsmagick_create_soilmap.bat
@echo off
if not exist GIMP_PF_soilmap.png goto PNGsMissing
md temp-png-conversion
cd temp-png-conversion
set MAGICK_TMPDIR=C:\PMC.Temp.Swap\GraphicsMagick

rem -fill DESTINATION COLOR
rem -opaque SOURCE COLOR
echo ID 0
gm convert ..\GIMP_PF_soilmap.png -fill "rgb(0, 0, 0)" -opaque "rgb(254, 209, 80)" id0.png
echo ID 1
gm convert id0.png -fill "rgb(1, 1, 1)" -opaque "rgb(123, 155, 118)" id1.png
echo ID 2
gm convert id1.png -fill "rgb(2, 2, 2)" -opaque "rgb(138, 126, 114)" id2.png
echo ID 3
gm convert id2.png -fill "rgb(3, 3, 3)" -opaque "rgb(0, 42, 49)" id3.png

echo converting to 256 color 8 bit 256color.png ...
gm convert id3.png -colors 256 -depth 8 -compress none 256color.png
echo converting to grayscale grayscale.png ...
gm convert 256color.png -colorspace GRAY grayscale.png

copy grayscale.png ..\soilmap.png
cd ..
rd /q /s temp-png-conversion
echo All done :)
pause
exit

:PNGsMissing:
echo some PNGs are missing, aborting.
pause
exit
That above _run_graphicsmagick_create_soilmap.bat will check if GIMP_PF_soilmap.png is present in the current directory and will exit if it isn't. When its done running you have a new "soilmap.png" image ready to be used in Giants Editor. See Soil Types Precision Farming tutorial how to add soilmap to your terrain.
If something went wrong and you do not get soilmap.png or it will "not work" in GE, then just jump at the beginning of this tutorial and try again, you must have missed some part or made some sort of mistake. Remember that you cannot just copy soilmap.png over and expect it to work as-is, you must edit your terrain project files as explained in Soil Types Precision Farming tutorial page.